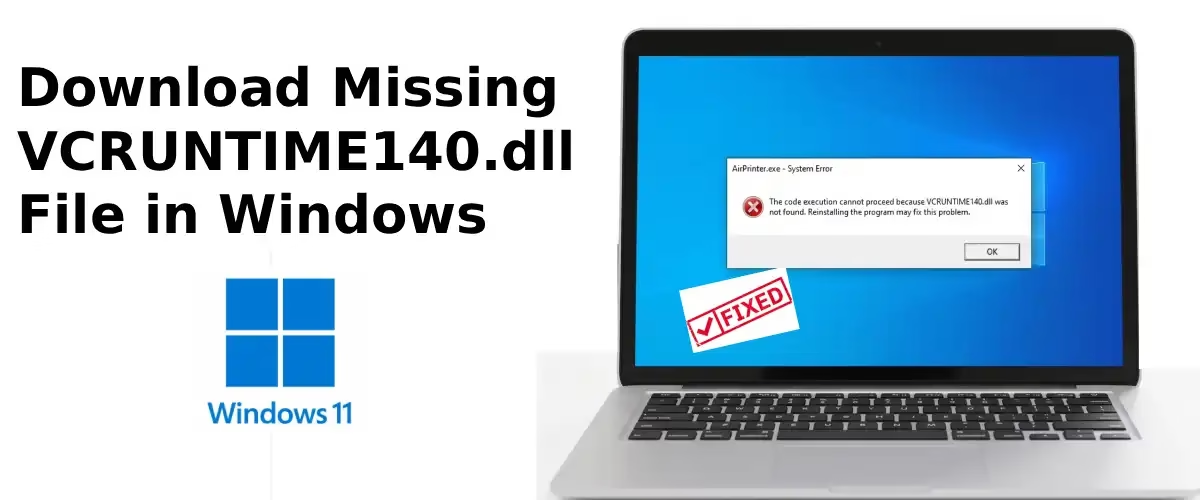
You double-click an app or launch a game on Windows 11 and suddenly a window appears. The message reads something like “The code execution cannot proceed because VCRUNTIME140.dll was not found” or “VCRUNTIME140.dll is missing.” The program refuses to start.
This error shows up often. Games, browsers, productivity tools, and creative software all rely on runtime libraries that Microsoft ships separately. VCRUNTIME140.dll belongs to the Microsoft Visual C++ Redistributable package. It supplies essential functions that many programs compiled with Visual Studio need to run. When the file is missing, corrupted, or the wrong architecture version sits on the system, the application cannot load its dependencies and simply stops.
The problem usually appears after a fresh Windows 11 install, an incomplete software setup, a Windows update that alters system files, or the removal of an older Visual C++ package. Third-party cleanup tools sometimes delete the file by mistake as well.
This guide walks you through the safest and most reliable ways to restore the missing file. Every method relies on official Microsoft tools and packages. You will learn how to install the correct redistributable, repair an existing installation, scan system files, and verify the fix. No random DLL download sites. No risky registry edits. Just clear steps that restore the library the way Microsoft intends.
By the end you should have the file back in place and the affected program running again.
Download Missing VCRUNTIME140.dll File
The single best way to fix a missing VCRUNTIME140.dll on Windows 11 is to install or repair the official Microsoft Visual C++ Redistributable. Individual DLL files downloaded from unofficial sites often carry malware, version mismatches, or incomplete dependencies. Microsoft packages the correct file together with every supporting library the runtime needs. Installing that package places VCRUNTIME140.dll in the right system folders for both 32-bit and 64-bit programs.
Below are the practical methods ranked from most effective to supporting steps. Follow them in order until the error disappears.
1. Install the Latest Microsoft Visual C++ Redistributable
This method solves the problem for the majority of users. Visual Studio 2015 through the current releases share the same v14 runtime. That runtime includes VCRUNTIME140.dll along with related files such as MSVCP140.dll.
- Open your browser and go to the official Microsoft page that lists the latest supported Visual C++ Redistributable downloads.
- Look for the section titled Latest supported redistributable version.
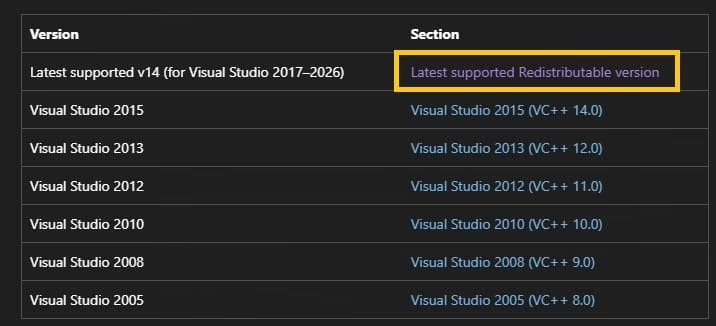
- Download both the X64 and X86 packages. Even on a 64-bit Windows 11 system many applications remain 32-bit and need the X86 package. The ARM64 package is only required on ARM devices.
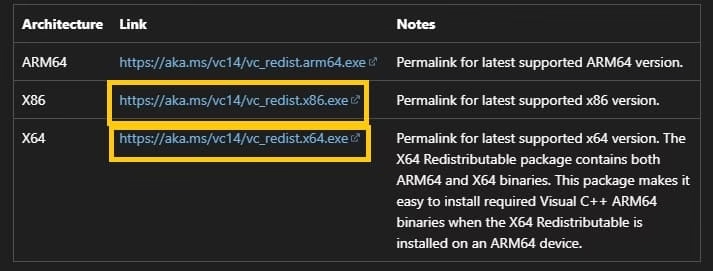
- Save the files, then run the X64 installer first.
- Accept the license terms and click Install.
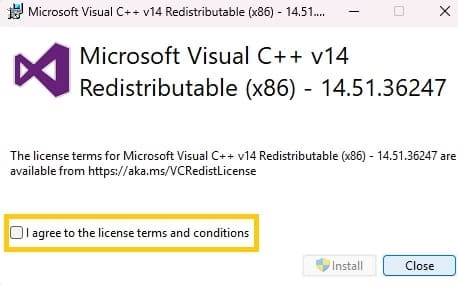
- When it finishes, run the X86 installer the same way.
- Restart your computer after both packages complete.
- Launch the program that previously showed the error. In most cases the message is gone.
If you already see Microsoft Visual C++ 2015-2022 Redistributable entries in your installed apps list, the next method may be faster.
Also know: Best Dll Fixer to Fix Missing Dll Files
2. Repair an Existing Visual C++ Installation
Sometimes the package sits on the system but the files inside it have become damaged. Windows offers a built-in repair option that restores the missing or corrupted components without a full reinstall.
- Press Windows + I to open Settings. Select Apps, then Installed apps.
- In the search box type Visual C++. You will usually see two entries for the 2015-2022 Redistributable, one x64 and one x86.
- Click the three dots next to each entry and choose Modify.
- In the installer window that appears select Repair and wait for the process to finish.
- Repeat for the other architecture if it is present.
- Restart the PC and test the application again.
Repair often succeeds when a previous update or cleanup left the installation incomplete.
3. Run the System File Checker
Windows includes a tool that scans protected system files and replaces any that are missing or corrupt. VCRUNTIME140.dll is not a core Windows system file, yet the System File Checker can still help when other runtime components are involved or when the redistributable installation left residual problems.
- Open the Start menu, type cmd, right-click Command Prompt, and choose Run as administrator.
- In the elevated window type the following command and press Enter:
sfc /scannow
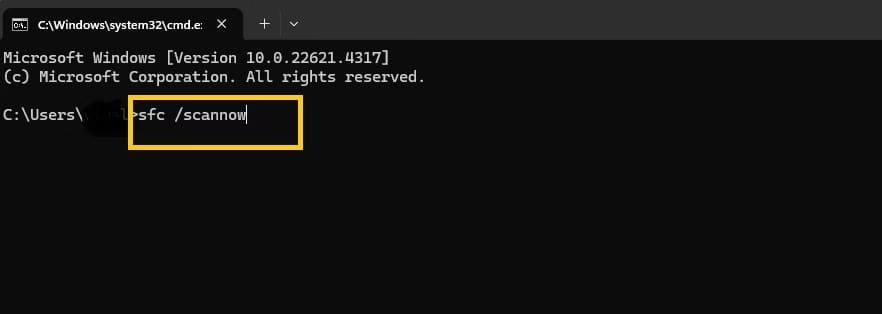
- The scan takes several minutes. Do not close the window until it reaches 100 percent. When it finishes, restart the computer.
If the tool reports that it found and repaired files, try the original program once more.
4. Use DISM to Repair the Windows Image First
If System File Checker reports that it cannot fix some files, the component store itself may need attention. Deployment Image Servicing and Management (DISM) restores the health of the Windows image so that SFC can work properly.
- Open an elevated Command Prompt the same way as before.
- Run these two commands one after the other, waiting for each to complete:
DISM /Online /Cleanup-Image /ScanHealth
DISM /Online /Cleanup-Image /RestoreHealth
- The RestoreHealth command contacts Windows Update to obtain clean files.
- After it finishes, run sfc /scannow again.
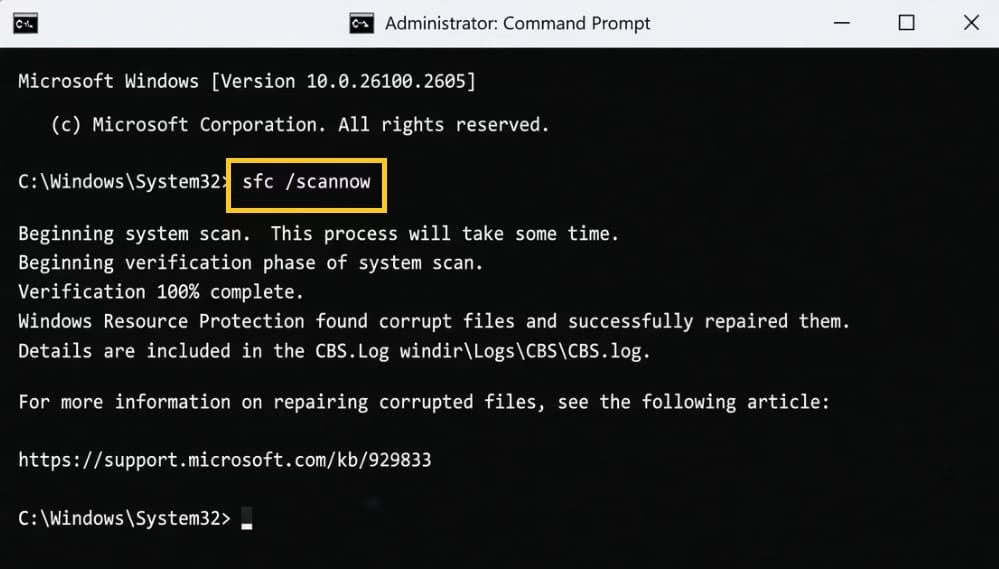
Restart and check whether the VCRUNTIME140.dll error remains.
5. Update Windows 11 Completely
Microsoft occasionally delivers runtime updates through the regular Windows Update channel. An outdated system can leave older redistributable components incomplete.
- Open Settings, go to Windows Update, and click Check for updates.
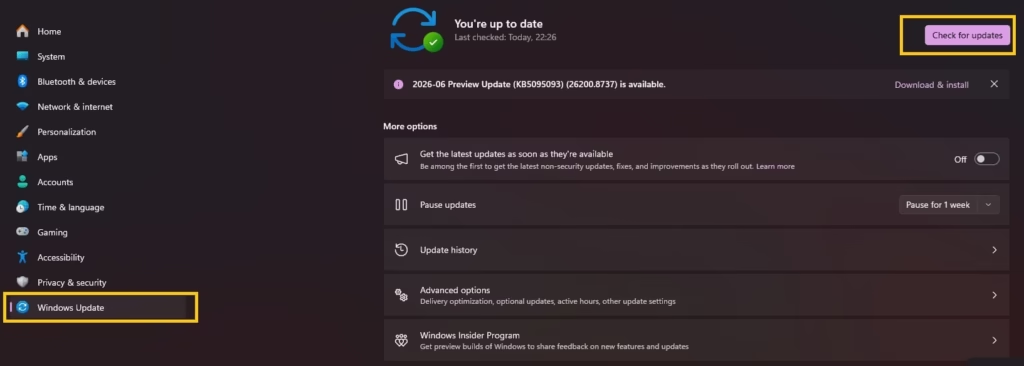
- Install every available update, including optional ones if they appear.
- Restart when prompted and test the application.
6. Reinstall the Affected Application
Some programs ship their own copy of the Visual C++ runtime inside the installer. If the original setup failed halfway, the local copy never landed correctly.
Uninstall the program through Settings > Apps, restart the computer, then download a fresh installer from the official publisher site and run it again.
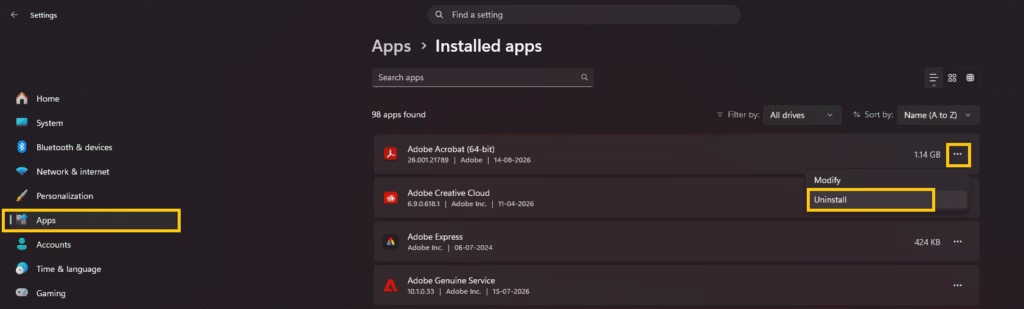
This step works especially well for games and creative suites that bundle the redistributable.
7. Confirm Architecture and Multiple Versions
Windows 11 is almost always 64-bit, yet many older titles still rely on 32-bit libraries. Installing only the x64 package leaves those programs without the file they need. Always install both. You may also see several Visual C++ Redistributable versions listed (2013, 2015-2022, and so on). Leave the older ones in place unless they conflict. Side-by-side installation is normal and expected.
After any of the methods above
- Open File Explorer and navigate to C:\Windows\System32.
- Search for VCRUNTIME140.dll.

- On a 64-bit system you should also find a copy under C:\Windows\SysWOW64 for 32-bit programs.
- The presence of the file does not guarantee the correct version, so the official redistributable remains the preferred source.
Avoid any website that offers a lone VCRUNTIME140.dll download. Those files frequently lack digital signatures, contain outdated code, or hide malware. Microsoft’s own packages carry proper signatures and install every required companion library at the same time.
If the error continues after you have installed both architectures, repaired the packages, run the system scans, and updated Windows, the problem may lie with the specific application. Contact the software vendor and ask whether their latest build still requires the v14 runtime or whether a newer package is needed.
Conclusion
A missing VCRUNTIME140.dll stops programs cold, yet the fix is usually straightforward. The file belongs to the Microsoft Visual C++ Redistributable, and the safest recovery path is always the official package. Installing both the x64 and x86 versions, repairing an existing installation, or letting SFC and DISM restore system health resolves the issue for nearly every Windows 11 user.
Stick to Microsoft’s own download page and built-in repair tools. You protect your system from the risks that come with unofficial DLL sites and you restore the exact runtime the developers intended. Once the library is back in place the error message disappears and the application launches as expected. Keep Windows updated and avoid aggressive system cleaners that remove redistributable files, and you will rarely see the problem again.

Amanda Starc
Amanda is a dedicated technical web content writer with a passion for transforming complex ideas into compelling and accessible online narratives. With a background in web development, and digital Marketing I bring a unique blend of technical expertise and creative storytelling to the digital domain.
Recent Posts
How to Download Missing VCRUNTIME140.dll File in Windows 11
Editorial Team, 08 Sep 2026
Most Used Tags

Get amazing web and
app development deals
for your business from us.
