Ever powered on your computer only to watch it hunt for an operating system in the wrong place? That moment of waiting while the screen stays blank or flashes an error often traces back to something called the BIOS boot order. Most people never think about this setting until they need to install a fresh copy of Windows, run a recovery tool from a USB stick, or fix a system that refuses to start properly. Understanding and adjusting it gives you real control over how your machine wakes up every time.
BIOS, or its modern replacement UEFI, acts like the quiet conductor of your computer’s startup process. Right after you press the power button, the firmware runs a quick self-check on the hardware. Then it looks at a prioritized list of devices and tries to load an operating system from the first one that works. Change that list and you change where the computer looks first. The process stays the same whether you run Windows 11, an older version, or even Linux. Once you know how the order works and how to rearrange it, many everyday installation and troubleshooting tasks become far simpler.
This guide walks through the concept in plain language, shows exactly how to adjust the order on most systems, and covers the quickest way to return everything to factory settings if you ever need a clean slate. The steps stay practical and focused on what actually appears on real motherboards from common brands.
BIOS Boot Order
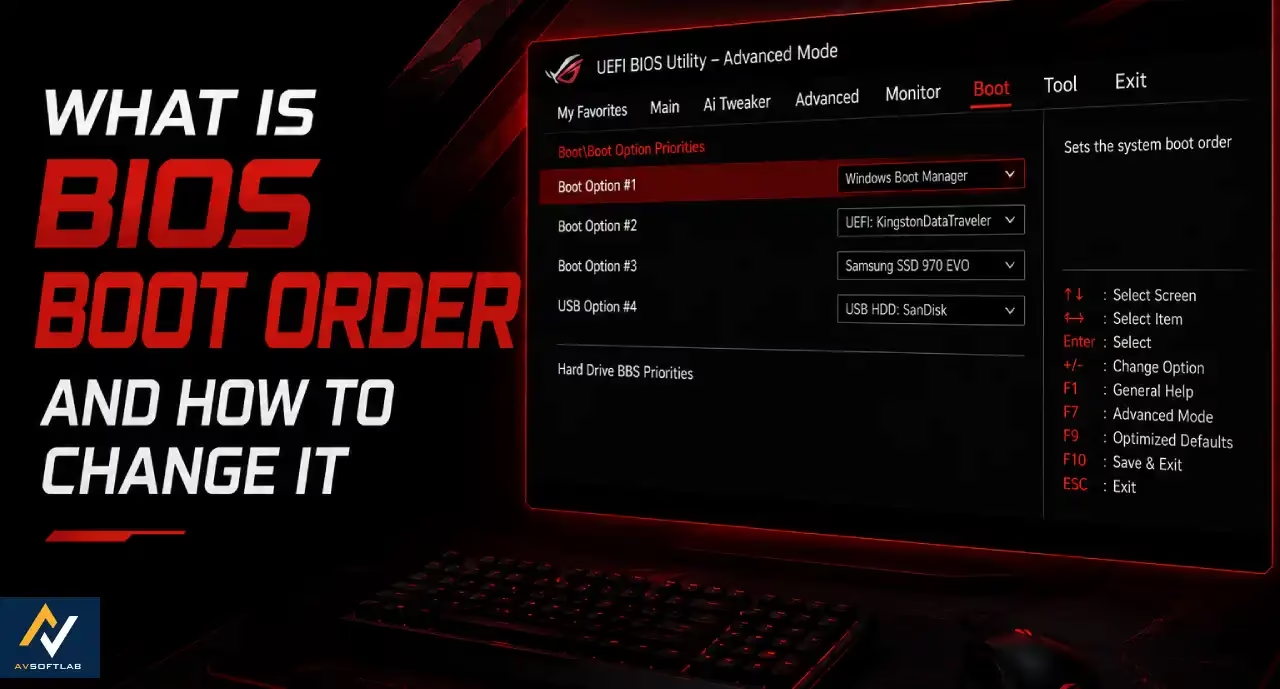
The BIOS boot order, sometimes called the boot sequence or boot priority, is simply the ranked list of storage devices your computer’s firmware checks when it starts. After the power-on self-test finishes, the firmware moves down that list one item at a time. It tries the first device. If that device holds a valid bootloader, the operating system loads. If not, the firmware moves to the next device on the list and repeats the check.
Typical devices that appear in the list include the internal solid-state drive or hard drive that holds Windows, any USB flash drives currently plugged in, optical drives if your machine still has one, and sometimes a network option for PXE boot. On modern systems the list often shows entries such as Windows Boot Manager, the specific model of your SSD, or the brand name of a USB stick.
The order matters because the computer stops looking as soon as it finds a working boot device. If your main SSD sits second and a nearly empty USB drive sits first, the machine may pause or display a “no bootable device” message while it examines the USB. Placing the correct drive at the top removes that delay and prevents accidental boots from the wrong media.
UEFI has largely replaced traditional BIOS on computers built in the last decade. The underlying idea remains identical, though the interface looks cleaner and often supports a mouse. Many boards still label the section “Boot” or “Boot Option Priorities,” so the practical steps stay familiar even when the visual style changes. Understanding this single setting removes a common roadblock when you need to install an operating system, run disk diagnostics, or recover files from a system that will not start normally.
How to Change the BIOS Boot Order (Complete Guide)
Your computer’s boot order tells it which device to check first when you power it on. Most of the time that’s your internal SSD or hard drive, but there are plenty of situations where you’ll need to change it, like installing Windows from a USB drive, running a recovery tool, or booting into a different operating system entirely.
I’ve changed my own boot order more times than I can count, mostly while setting up new PCs or troubleshooting ones that refuse to start. It looks intimidating the first time you see a BIOS screen, but the process only takes a couple of minutes once you know where to look.
Here’s how to do it, along with what to do if you ever need to undo your changes.
Method 1: Change the Boot Order From BIOS/UEFI
This is the standard way to permanently change which device boots first.
Step 1. Shut down your computer completely.
Don’t just restart it from Windows. A full shutdown gives you a clean window to catch the BIOS prompt.
Step 2. Turn the computer back on and watch the first screen closely.
The manufacturer logo appears for only a second or two, and that’s your cue.
Step 3. Press the setup key repeatedly as the computer starts.
The key depends on your manufacturer, but it’s usually one of these:
- Delete
- F2
- F10
- Esc
- F12
You’ll often see a brief message like “Press Del to enter Setup” or “Press F2 for BIOS” flash on screen. If you miss it, just restart and try again.

Step 4. Find the Boot section.
Once you’re inside BIOS/UEFI, look for a tab or menu labeled Boot, Boot Priority, Boot Option Priorities, or Startup.
Some motherboards open in a simplified EZ Mode first. If that happens, press F7 to switch to Advanced Mode, where the boot settings live.
Step 5. Locate Boot Option #1.
You should see a prioritized list, something like Boot Option #1, Boot Option #2, and Boot Option #3. Select Boot Option #1 and press Enter.
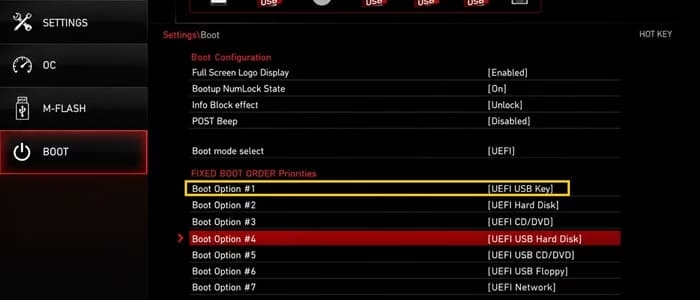
Step 6. Choose your first boot device.
For everyday Windows use, pick Windows Boot Manager or your internal SSD. If you’re installing Windows or running a recovery tool, select your USB Flash Drive instead. Press Enter to lock in the choice.
Step 7. Reorder the remaining devices if needed.
Adjust Boot Option #2, #3, and so on to match your preferred sequence. Depending on your BIOS, you can do this by dragging devices with a mouse, using the + and – keys, or moving items up and down with the arrow keys.
Step 8. Save your changes.
Press F10, or head into the Save & Exit menu.
Step 9. Confirm the save.
A prompt will ask you to confirm. Select Yes or OK.
Step 10. Let your computer restart.
It’ll reboot automatically using the new boot priority.
Also know: Extend Your Battery Life Effectively Windows with Easy Hacks
Method 2: Use the One-Time Boot Menu
If you only need to boot from another device once, there’s no need to permanently change your BIOS settings. The one-time boot menu is faster and leaves your regular boot order untouched.
Step 1. Connect the USB drive or other bootable device you want to use.
Step 2. Shut down and power the computer back on.
Step 3. Immediately press the Boot Menu key.
This is usually F8, F11, or F12, but it varies by manufacturer.
Step 4. Select the device you want to boot from, such as your USB flash drive.
Step 5. Press Enter.
Your computer boots from that device for the current session only. Once you restart normally, it goes right back to your saved boot order.
Method 3: Enter UEFI Firmware Settings From Windows
If you keep missing the BIOS key during startup, Windows gives you a more reliable route in through the Settings app.
Step 1. Press Windows + I to open Settings.
Step 2. Go to System, then Recovery.
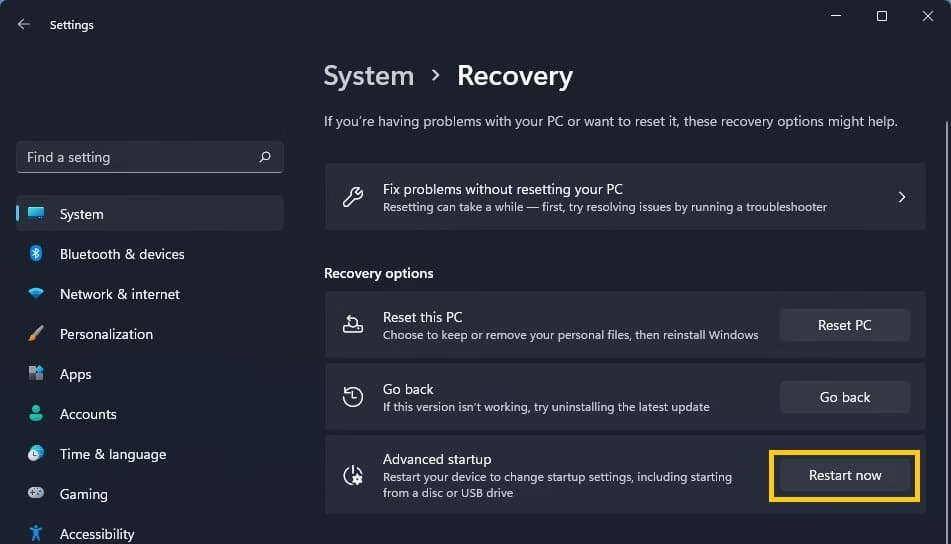
Step 3. Open Advanced startup.
Under Recovery options, find Advanced startup and click Restart now.
Step 4. Open the troubleshooting options.
Once your PC restarts, select Troubleshoot, then Advanced options.
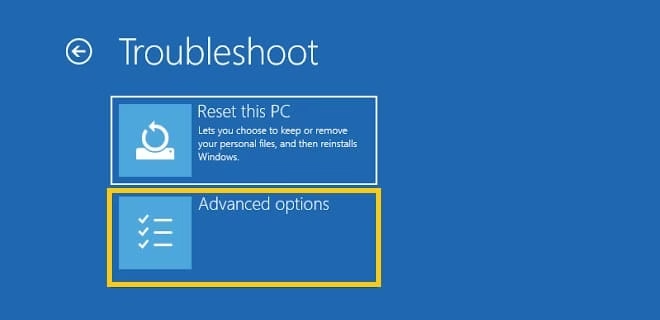
Step 5. Click UEFI Firmware Settings.
Step 6. Click Restart.
Your computer boots directly into the firmware setup utility, skipping the timing guesswork entirely.
Step 7. Open the Boot section.
Set your preferred device as Boot Option #1.
Step 8. Save and exit.
Press F10 or select Save Changes and Exit, then confirm.
A quick tip: If you used a USB drive to install Windows or run a recovery tool, remember to move your internal drive or Windows Boot Manager back to the top of the list once you’re done. Otherwise your computer may keep trying to boot from the USB drive every time you start it.
Also know: How to Reset Your PC for a Fresh Start on Windows
How to Reset the BIOS Boot Order to Default
Sometimes the simplest fix for boot problems is resetting the BIOS entirely, which restores the boot order and other firmware settings your manufacturer originally shipped.
Method 1: Reset From BIOS/UEFI
Step 1. Restart your computer and wait for the manufacturer logo.
Step 2. Press your BIOS setup key repeatedly.
Common keys include F2, F10, F12, Delete, or Esc.
Step 3. Find the defaults option.
It might be labeled Load Setup Defaults, Load Optimized Defaults, Restore Defaults, Load Default Settings, or Reset to Default.
You can find it under the Exit or Save & Exit tab, though some boards tuck it under Tools, Security, or Advanced.
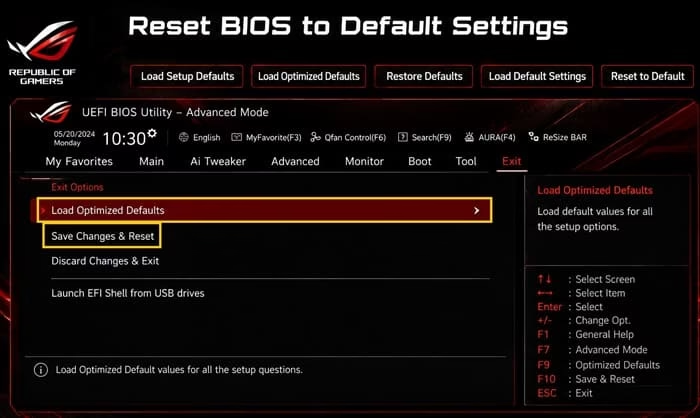
Step 4. Select the defaults option and press Enter.
Step 5. Confirm the reset when prompted by selecting Yes or OK.
Step 6. Save the changes.
Go to Save & Exit and select Save Changes and Exit, or press F10 and confirm.
Step 7. Let the computer restart with the restored settings.
Step 8. Check the boot order.
Enter BIOS again if you want to double-check that your primary drive or Windows Boot Manager is back at the top of the boot list.
Method 2: Reset Using the CMOS Battery
If your BIOS doesn’t have a reset option, or it’s not accessible, you can clear the settings manually using the CMOS battery on a desktop motherboard.
Step 1. Shut down the computer completely.
Step 2. Unplug the power cable and disconnect any other external power sources.
Step 3. Open the computer case to access the motherboard.
Step 4. Locate the small, round, coin-shaped CMOS battery.
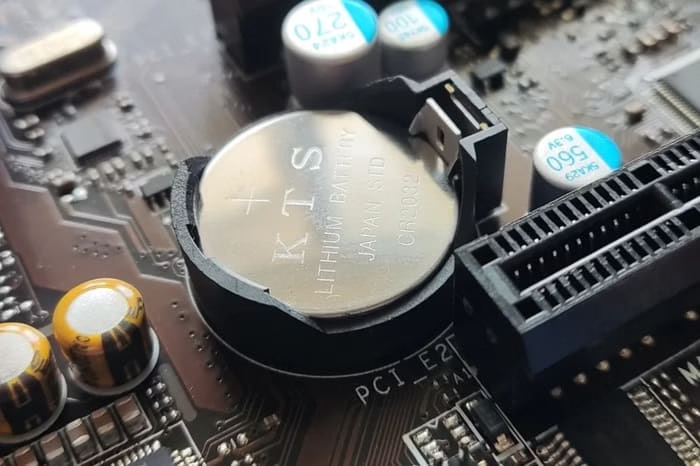
Step 5. Carefully remove it from its holder.
Step 6. Leave it out for about 5 to 10 minutes so the stored BIOS settings can fully clear.
Step 7. Reinstall the battery in the correct orientation.
Step 8. Close the case, reconnect the power cable, and turn the computer back on.
Step 9. Enter BIOS/UEFI and verify the boot order.
You’ll likely need to reconfigure a few custom settings as well.
Also know: Fix Black Screen on Startup in Windows 11
Method 3: Reset Using the Clear-CMOS Jumper
Some desktop motherboards include a dedicated Clear CMOS jumper or button, which is a quicker alternative to pulling the battery.
Step 1. Shut down the computer and unplug the power cable.
Step 2. Open the case and find the jumper, usually labeled CLR_CMOS, CLEAR CMOS, or CLRTC.
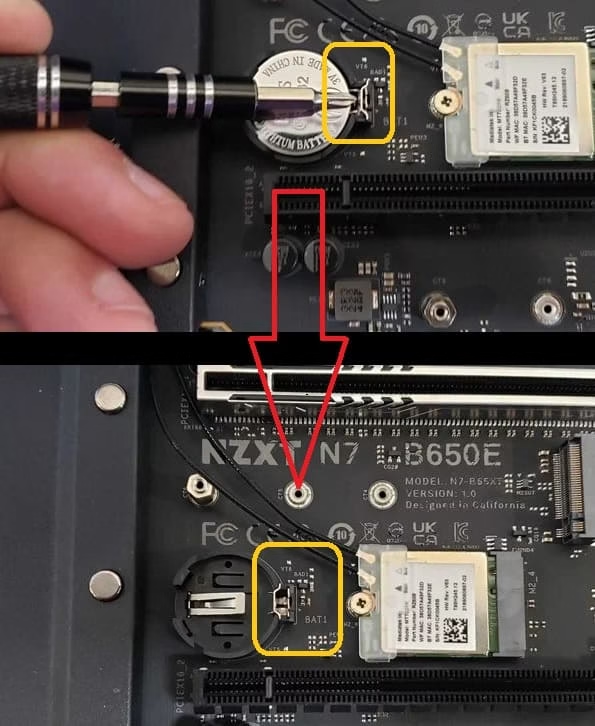
Step 3. Check your motherboard manual for the exact pin locations and procedure, since these vary between boards.
Step 4. Move the jumper to the clear position for the duration specified in your manual, typically just a few seconds.
Step 5. Return the jumper to its original position.
Step 6. Reconnect the power cable and start the computer.
Step 7. Enter BIOS/UEFI and check that the boot order looks correct.
One thing worth knowing: Resetting your BIOS doesn’t just touch the boot order. It also wipes other customized settings, so be ready to reconfigure things like memory profiles, fan curves, virtualization settings, or any other firmware tweaks you’d made before.
Also know: What is HPIA and How to Download It on Windows
Conclusion
Mastering the BIOS boot order removes one of the most common sources of frustration during system installs, upgrades, and recovery work. The setting itself is straightforward once you know where to look, and the steps remain largely the same across both older BIOS and modern UEFI firmware. Taking a few minutes to rearrange the priority list or restore the defaults can save hours of troubleshooting later. Keep the process simple: enter the setup utility, make the needed change, save, and exit. Your computer will then start exactly where you want it to every time.

Amanda Starc
Amanda is a dedicated technical web content writer with a passion for transforming complex ideas into compelling and accessible online narratives. With a background in web development, and digital Marketing I bring a unique blend of technical expertise and creative storytelling to the digital domain.
Recent Posts
What is BIOS Boot Order and How to Change It
Editorial Team, 01 Sep 2026
Most Used Tags

Get amazing web and
app development deals
for your business from us.
