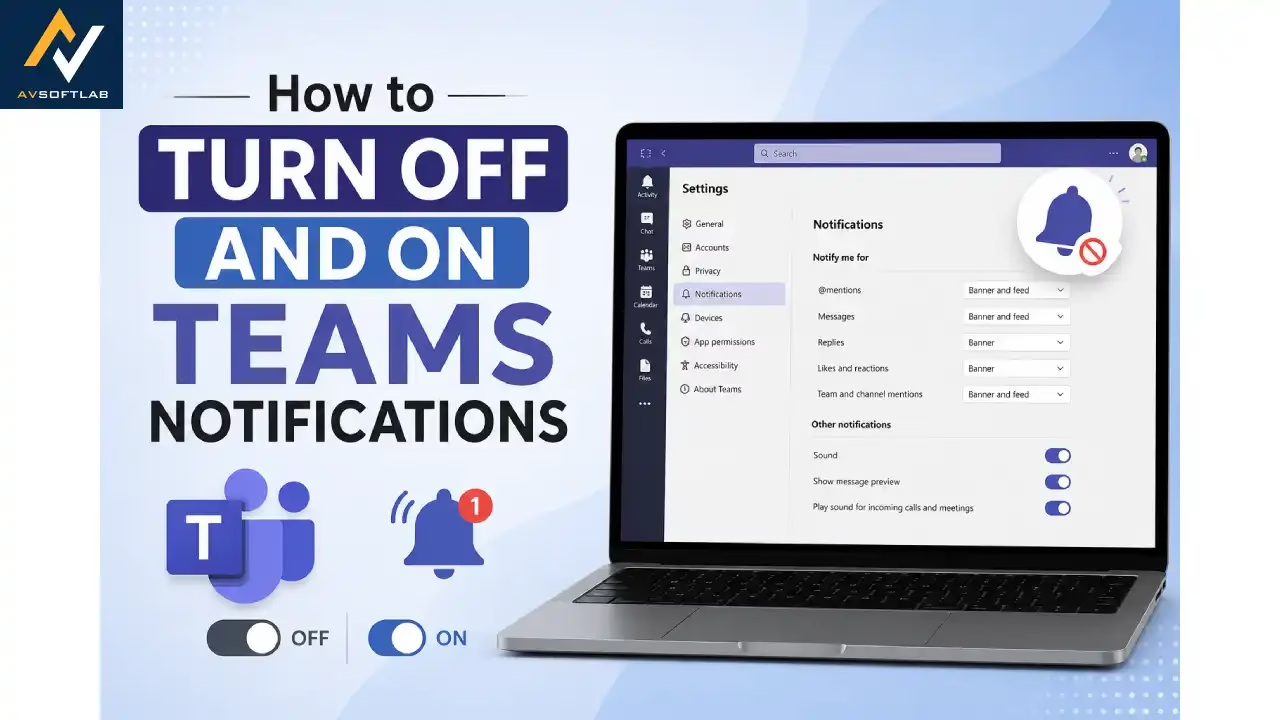
Microsoft Teams keeps your work conversations flowing, but the constant pings can pull your attention in every direction. One minute you are deep in a report, the next a channel update or chat reply pops up and breaks your focus. Many people search for ways to silence the noise without missing truly important calls or meetings.
This guide walks you through practical steps to turn off Teams notifications when you need quiet time and switch them back on when you want to stay connected. You will find clear methods for the desktop app, mobile devices, and even individual chats or channels. Everything here draws from current Microsoft guidance so the steps stay reliable. By the end you will know exactly how to mute Teams notifications, restore them, and keep control over your digital workspace.
How to Turn Off Teams Notifications
Turning off notifications in Microsoft Teams gives you breathing room during focused work, meetings, or personal time. The app offers several layers of control. You can silence almost everything except calls and meetings, mute specific channels, or block alerts on your phone during quiet hours.
The process feels straightforward once you know where to look. Start inside the Teams settings menu, then fine-tune what still reaches you. Below are the most useful methods, each with a short explanation and clear steps.
1. Mute All Notifications Inside Teams Desktop App
This option works best when you want a near-total pause on banners and sounds while still receiving calls and meeting alerts. Available mainly on Windows, it keeps the app running quietly in the background. Many users rely on it during deep work sessions because it removes the constant visual and audio interruptions without logging out.
- Open Microsoft Teams on your computer.
- Click the three dots next to your profile picture in the top right corner.
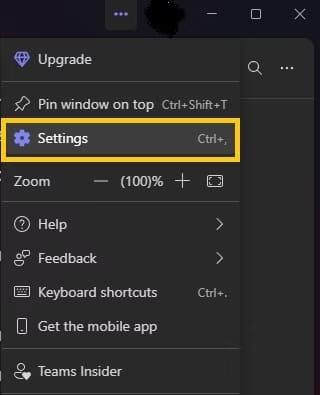
- Select Settings from the menu.
- Choose Notifications and activity on the left side.
- Under the General section, turn on Mute all notifications (except for calls and meetings).
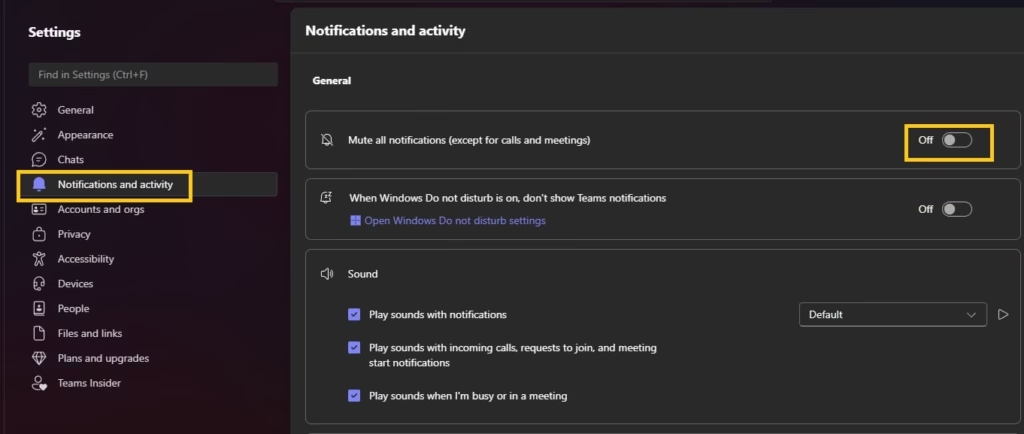
- Optionally turn off Play sounds with notifications if any residual audio remains.
- Close the settings window. Changes take effect right away.
You can still open the Activity feed later to catch up on what you missed.
Also know: Best Methods to Sync Clipboard Across Devices Easily on Windows 11/10
2. Mute Specific Chats or Channels
Sometimes you only need silence from one busy conversation or team channel rather than everything. Muting a single chat stops new message alerts from that thread while leaving the rest of your notifications intact. Channel muting works the same way and proves useful for high-volume groups that do not require real-time attention.
- For a chat, go to the Chat list on the left.
- Hover over the conversation you want to quiet.
- Click the three dots that appear.
- Select Mute.
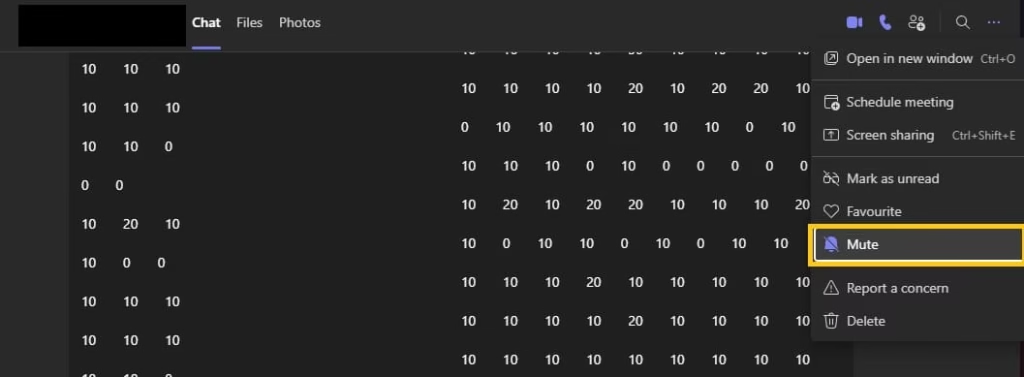
- For a channel, open the Teams list, hover over the channel name, click the three dots, and choose Channel notifications.
- Set the options to Off or limit them to only mentions and replies you care about.
- Confirm your choice. The channel or chat will no longer push banners.
This selective approach keeps important people and projects visible while cutting the rest.
3. Turn Off Notifications on Windows or Mac System Settings
If the Teams app itself still sends banners after you adjust its internal settings, the operating system may be the next layer to control. Windows and macOS both let you disable notifications for individual apps. This method stops pop-ups at the system level and works well as a backup when app settings alone fall short.
- On Windows, open Settings, go to System, then Notifications.
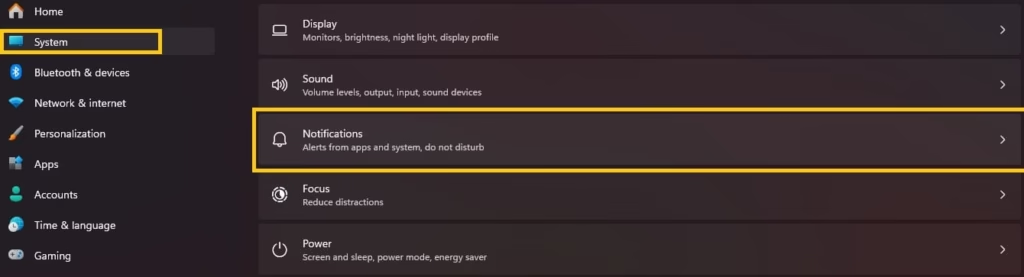
- Scroll to Microsoft Teams in the list of apps.
- Toggle the switch off or turn off banners and sounds separately.
- On Mac, open System Settings, select Notifications, find Microsoft Teams, and switch notifications off.
- Restart Teams if the change does not appear immediately.
System-level control adds an extra safety net for uninterrupted focus.
Also know: Customize Notifications and Quick Settings Windows 11
4. Set Quiet Hours on Mobile Devices
Mobile notifications often arrive at the least convenient moments. Quiet hours let you schedule automatic silence during evenings, weekends, or any block of time you choose. The setting lives inside the Teams mobile app and works independently of your desktop preferences.
- Open the Teams app on your phone.
- Tap your profile picture in the top left.
- Select Notifications.
- Tap Block notifications, then During quiet hours.
- Turn on the certain hours option and set your preferred start and end times.
- Choose specific days if you want silence only on weekends or weekdays.
- Save the settings.
Outside those hours notifications return automatically, so you never miss morning updates.
5. Mute Notifications Only During Active Meetings
A less commonly used but highly practical option stops most alerts the moment a meeting starts. You still receive messages related to the meeting itself, yet everything else stays quiet. This keeps your attention on the conversation without having to remember to flip a global mute switch each time.
- Open Teams Settings and more, then Settings.
- Go to Notifications and activity.
- Under Display, clear the checkbox for Show notifications during calls and meetings.
- Save and exit.
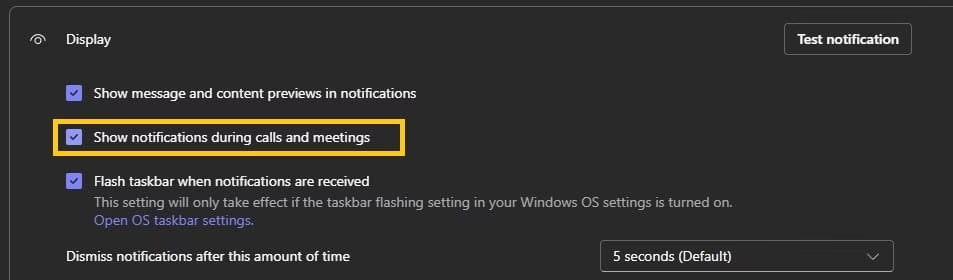
When the meeting ends, normal notifications resume. Pair this with the mute-all option for even stronger focus control.
Also know: How to Get Visual Alerts Instead of Sounds in Windows
How to Turn On Teams Notifications
After a period of silence you may need the alerts back. Turning notifications on restores banners, sounds, and mobile pushes so you stay current with chats, mentions, and meetings. The same menus you used to mute also reverse the process.
Restore settings carefully. You can bring everything back at once or re-enable only the types of alerts that matter most. The methods below cover desktop, system, and mobile paths.
1. Restore Notifications in the Teams Desktop App
This returns the full range of alerts inside Teams itself. Once you reverse the mute settings, banners and sounds reappear for messages, mentions, and channel activity according to your previous preferences or the defaults.
- Open Microsoft Teams.
- Click the three dots near your profile picture and choose Settings.
- Select Notifications and activity.
- Under General, turn off Mute all notifications (except for calls and meetings).
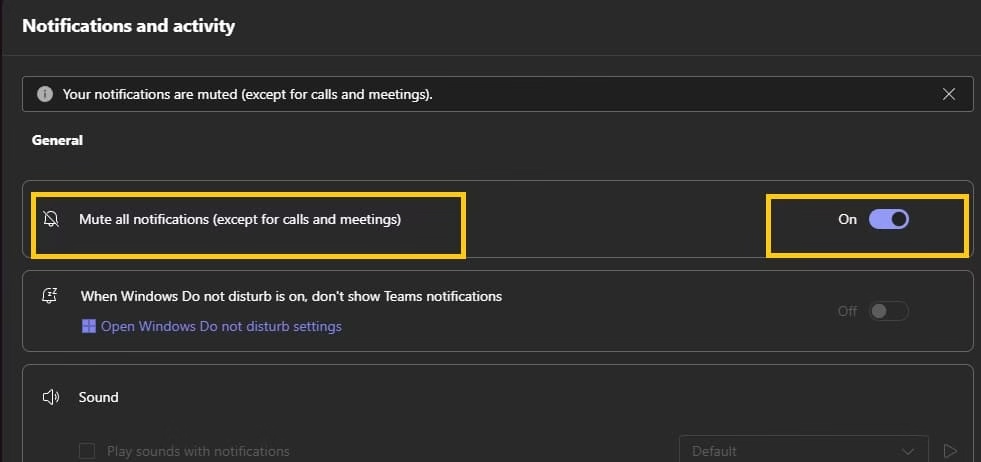
- Enable Play sounds with notifications if you want audio cues.
- Move to Chats and channels and set each category (messages, mentions, replies, reactions) to Banner and feed or Only show in feed.
- Check the Meetings section and turn Meeting start notifications back on if needed.
- Close settings. Alerts should start arriving within moments.
Test with a quick message from a colleague to confirm everything works.
2. Re-enable Notifications Through Windows or Mac Settings
System settings sometimes override the app. If banners never returned after you adjusted Teams, check the operating system next. Turning the app back on at this level restores the connection between Teams and your desktop notification center.
- On Windows, open Settings > System > Notifications.
- Locate Microsoft Teams and toggle the main switch on.
- Enable banners and sounds as preferred.
- On Mac, open System Settings > Notifications, select Microsoft Teams, and turn Allow Notifications on.
- Choose banner style and sound options that suit your workflow.
- Relaunch Teams if the change feels delayed.
This step often solves cases where the app settings look correct but nothing appears on screen.
Also know: Finding Your App-Wise Data Usage in Windows 11 & 10
3. Turn Notifications Back On for Mobile
Mobile quiet hours or blocked permissions can leave you without alerts even when the desktop works fine. Re-enabling requires both the Teams app and the phone’s system settings.
- Open the Teams mobile app and tap your profile picture.
- Go to Notifications.
- Turn off any active quiet hours or block-during-meetings options.
- If the app still shows notifications as blocked, tap Open settings.
- In your phone’s Settings app, find Teams and allow notifications.
- Enable sounds, badges, and lock-screen alerts according to your preference.
- Return to Teams and choose All activity or the specific categories you need.
Once complete, test by sending yourself a message from another device.
4. Restore Only Priority and Meeting Alerts First
Instead of flooding yourself with every possible notification, start by turning on the highest-value ones. This gradual approach prevents overwhelm after a long mute period and lets you rebuild your notification habits deliberately.
- In Teams Settings > Notifications and activity, first enable Meeting start notifications and Play sound with incoming calls.
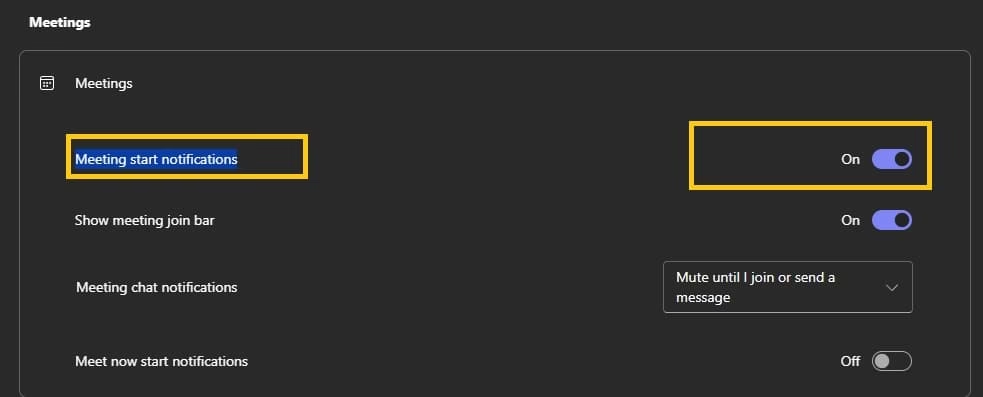
- Under Chats and channels, set only Mentions and Replies to Banner and feed.
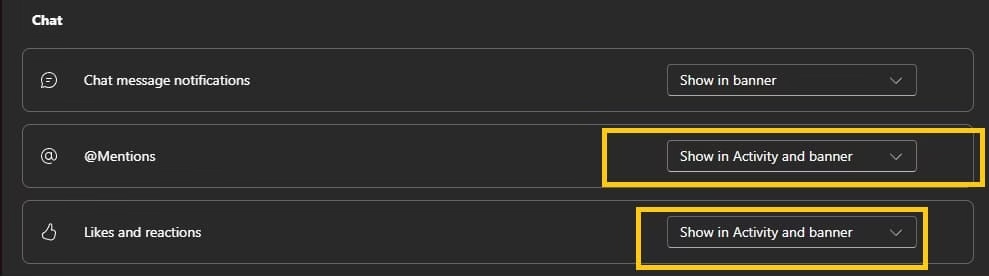
- Leave general messages and reactions on Only show in feed or Off for now.
- On mobile, allow notifications but keep quiet hours active during non-work times.
- After a day or two of testing, expand the settings further if you want more coverage.
This selective reactivation helps you stay informed without returning to the original distraction level.
Also know: How to Fix Lag on Pc While Working and Gaming
Conclusion
Managing Teams notifications is less about permanent silence and more about smart control. You now have clear paths to turn alerts off when focus matters and bring them back when collaboration needs attention. The desktop mute options, channel-specific settings, system-level controls, and mobile quiet hours give you flexibility across devices.
Experiment with the unique methods as well. Muting only during meetings or restoring priority alerts first can fine-tune the experience even further. Check your settings every few months because Teams updates occasionally shift menu locations. With these steps in place, the app supports your work instead of interrupting it.

Amanda Starc
Amanda is a dedicated technical web content writer with a passion for transforming complex ideas into compelling and accessible online narratives. With a background in web development, and digital Marketing I bring a unique blend of technical expertise and creative storytelling to the digital domain.
Recent Posts
How to Turn Off and On teams Notifications
Editorial Team, 30 Aug 2026
Most Used Tags

Get amazing web and
app development deals
for your business from us.
