Stuttering, screen tearing, or choppy video playback on your Windows 11 or Windows 10 PC can be incredibly frustrating—especially when you’re trying to enjoy a movie, YouTube video, or stream. Often, the culprit is a mismatch between your monitor’s refresh rate and the content’s frame rate. When these aren’t synced properly, the display struggles to keep up, resulting in jerky motion and poor viewing experience.
In this guide, we’ll explore easy, effective ways to sync refresh rates for smooth playback Windows. Whether you’re on Windows 11 with its handy Dynamic Refresh Rate feature or sticking with Windows 10, these methods will help you achieve buttery-smooth video. We’ll cover built-in Windows settings, GPU control panel tweaks, VRR (Variable Refresh Rate) options like G-Sync or FreeSync, and a few bonus tips for media players.
By the end, you’ll know exactly how to match your display’s refresh rate to your content for seamless playback. No more frustration—just smooth, enjoyable viewing. Let’s dive in and fix this once and for all!
Best ways to sync refresh rates for smooth playback Windows 11 & 10
Here are the most reliable, step-by-step methods based on official Microsoft guidance and trusted practices. Start with the simplest ones.
1. Change Refresh Rate via Windows Settings (Works Best for Both Windows 11 and 10)
This is the quickest and most universal fix. Windows often defaults to 60Hz even on high-refresh-rate monitors.
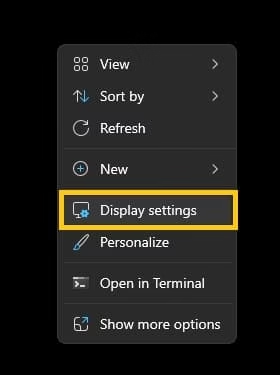
- Right-click on an empty area of your desktop and select Display settings.
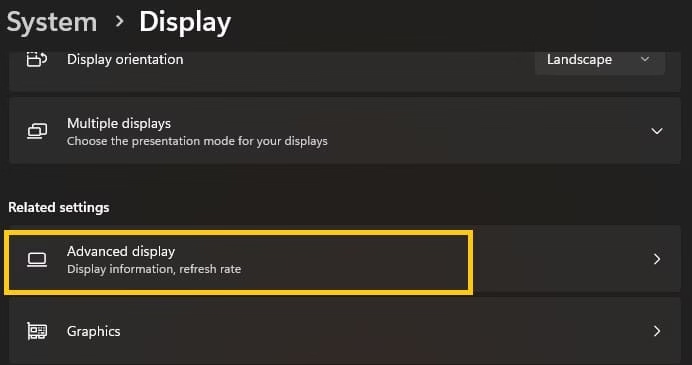
- Scroll down and click Advanced display (or Advanced display settings in Windows 10).
- Under “Choose a refresh rate,” click the dropdown menu and select the highest available rate your monitor supports (e.g., 120Hz, 144Hz, or 165Hz).
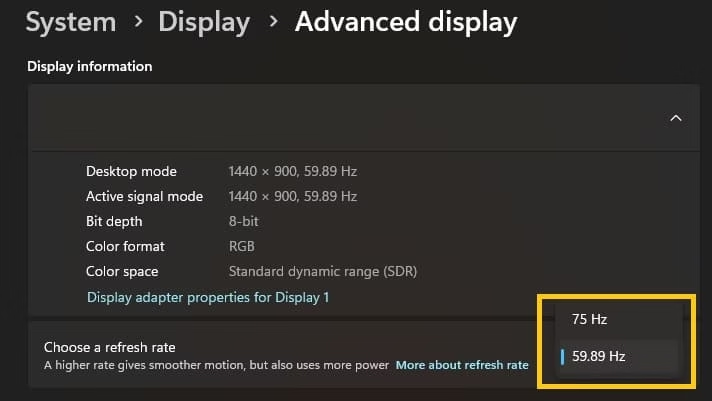
- Click Keep changes if prompted. Test video playback right away.
- For multiple monitors: Ensure all displays use the same refresh rate to avoid stuttering or playback issues.
Pro Tip: Higher refresh rates (120Hz+) generally provide smoother motion for video.
Also know: How to View Clipboard History in Windows 11
2. Enable Dynamic Refresh Rate (DRR) in Windows 11
Windows 11’s DRR smartly switches between high refresh rates for smooth content and lower ones for battery saving.
- Go to Settings > System > Display > Advanced display.
- Look for the Dynamic refresh rate toggle and turn it On – (only available if your hardware supports VRR and 120Hz+).
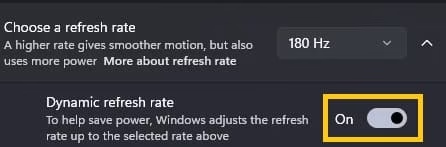
- This works great for video playback as it adapts dynamically.
If you notice issues in certain apps, toggle it off and use a fixed high rate instead.
3. Enable Variable Refresh Rate (VRR) / G-Sync / FreeSync
For even better syncing (especially with variable frame rate content), enable adaptive sync. This lets your monitor match the content’s frame rate dynamically.
In Windows Settings (Windows 11):
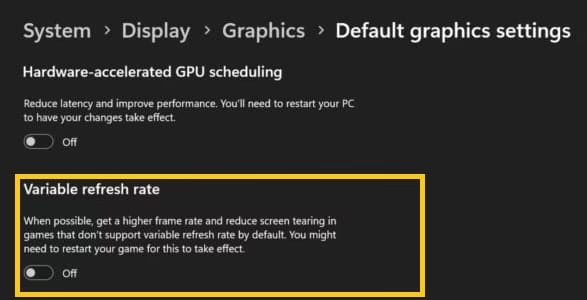
- Go to Settings > System > Display > Graphics (or Advanced graphics settings).
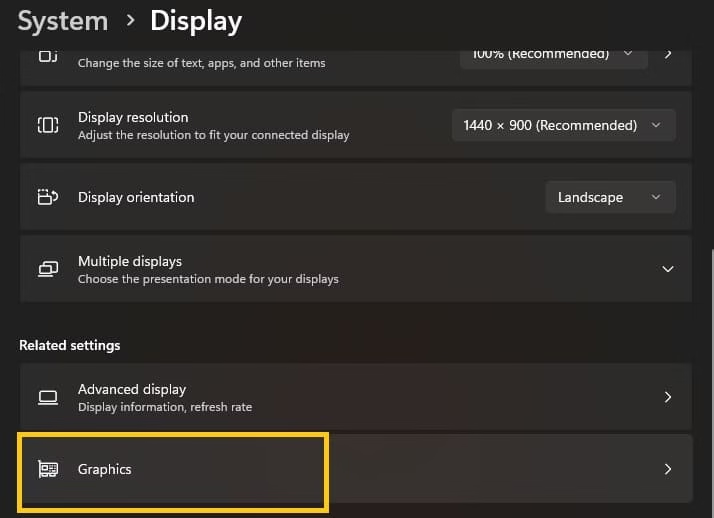
- Turn Variable refresh rate to On. (If Supported)
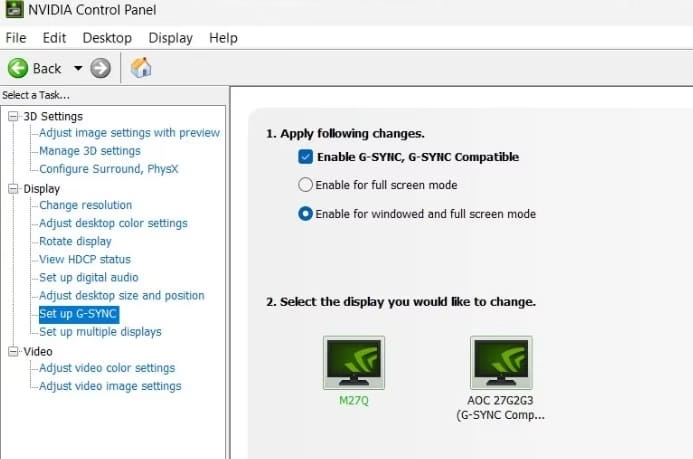
For NVIDIA GPUs (G-Sync):
- Right-click desktop → NVIDIA Control Panel.
- Go to Display > Set up G-SYNC.
- Check Enable G-SYNC, G-SYNC Compatible and enable it for your display (full screen and windowed if available).
- In Change resolution, confirm your high refresh rate.
For AMD GPUs (FreeSync):
- Open AMD Radeon Software.
- Go to Display and enable AMD FreeSync or Adaptive Sync.
Test with full-screen video for the best results. This is often the game-changer for smooth playback.
4. Optimize Video Playback Settings in Windows
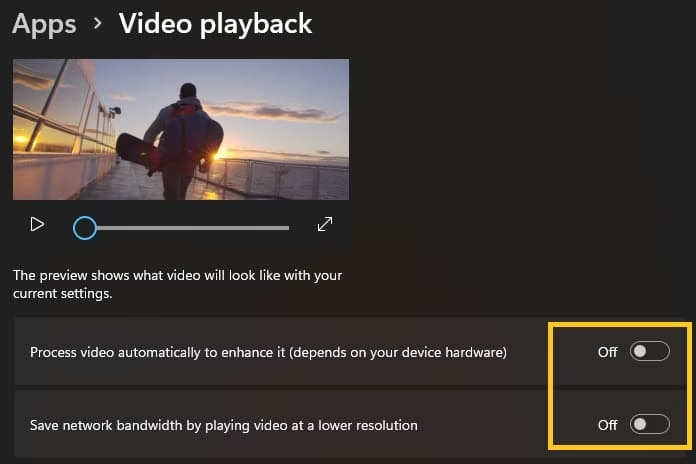
- Open Settings > Apps > Video playback.
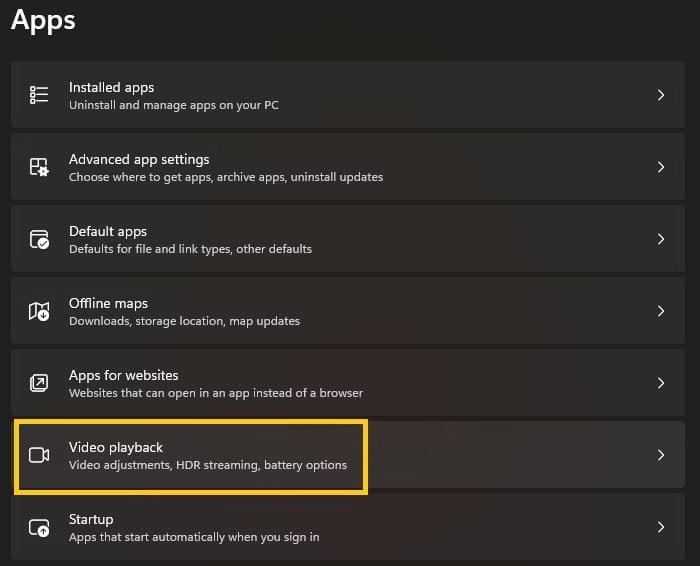
- Enable options like “Process video in Windows” or adjust resolution/bandwidth settings based on your needs.
- Use apps like VLC Media Player or Movies & TV, and set them to full screen for better sync.
Also know: How to Reset Your PC for a Fresh Start on Windows
5. Additional Quick Fixes for Stubborn Issues
- Update Graphics Drivers: Outdated drivers often cause mismatch problems. Download the latest from NVIDIA, AMD, or Intel.
- Use Full-Screen Mode: Many players sync better in exclusive full screen.
- Check Multiple Monitors: Set identical refresh rates across all displays.
- Restart your PC after changes to let them fully apply.
These steps are straightforward and work on most hardware setups for Windows 10 and 11.
Conclusion
Syncing refresh rates doesn’t have to be complicated. The best overall way for smooth playback on Windows 11/10 is to set your monitor to its highest native refresh rate in Display Settings, combined with enabling VRR (Dynamic Refresh Rate or G-Sync/FreeSync). This duo handles most video content beautifully by adapting to frame rates and eliminating tearing or stuttering.
Start with the Windows Settings method—it’s fast and effective for most users. If you have a compatible monitor and GPU, adding adaptive sync takes it to the next level. Experiment a bit, test your favorite videos, and enjoy that silky-smooth playback you deserve.
FAQs
Here are most commonly asked questions on syncing refresh rate in Windows 11 and 10
Q1. What is VRR for smooth Playback in Windows?
VRR, or Variable Refresh Rate, is a technology that lets your monitor dynamically adjust its refresh rate to match the frame rate of whatever you’re watching or playing. This eliminates common issues like screen tearing, stuttering, or choppy motion during video playback. In Windows, it’s often available through features like Dynamic Refresh Rate (DRR) in Windows 11 or technologies such as NVIDIA G-Sync and AMD FreeSync.
Q2. How to Synchronize Refresh Rate on Monitor?
To sync your monitor’s refresh rate, right-click on your desktop and go to Display settings > Advanced display. From there, select the highest refresh rate your monitor supports (like 120Hz or 144Hz) from the dropdown. For even better synchronization with varying content, enable Variable Refresh Rate in Windows settings or turn on G-Sync/FreeSync in your GPU control panel.
Q3. What Syncing a Refresh Rate Means in Laptop?
Syncing the refresh rate on a laptop means aligning the screen’s update frequency with the content’s frame rate so everything looks fluid and responsive. On laptops, this is particularly useful for balancing smooth video or gaming with battery life. Windows 11’s Dynamic Refresh Rate feature automatically switches between higher rates for smooth playback and lower ones to save power when your hardware supports VRR (typically 120Hz+ displays).
Q4. How to Change display refresh rate in Windows 10?
In Windows 10, right-click on the desktop and select Display settings. Scroll down and click Advanced display settings, then choose your preferred refresh rate from the dropdown menu under “Refresh rate.” Pick the highest one your monitor supports for the best results. After changing, click Apply and test it out. Make sure your graphics drivers are up to date, as this helps unlock all available options.
Q5. What are the Benefits of Syncing Refresh rate in Windows?
Syncing your refresh rate brings smoother motion in videos and games, reduces eye strain from less flickering, and eliminates annoying screen tearing or stuttering. It can improve responsiveness when scrolling or using a pen, and on laptops, smart syncing like Dynamic Refresh Rate helps maintain good battery life. Overall, it makes your Windows experience feel more premium and enjoyable, whether you’re watching content or working.

Amanda Starc
Amanda is a dedicated technical web content writer with a passion for transforming complex ideas into compelling and accessible online narratives. With a background in web development, and digital Marketing I bring a unique blend of technical expertise and creative storytelling to the digital domain.
Recent Posts

Get Help with File Explorer in Windows 11
Editorial Team, 23 Jun 2026

All Transformer Movies in Order Till 2026
Editorial Team, 22 Jun 2026

Best Methods to Sync Clipboard Across Devices Easily on Windows 11/10
Editorial Team, 19 Jun 2026
Most Used Tags
Blog Category
Get amazing web and
app development deals
for your business from us.