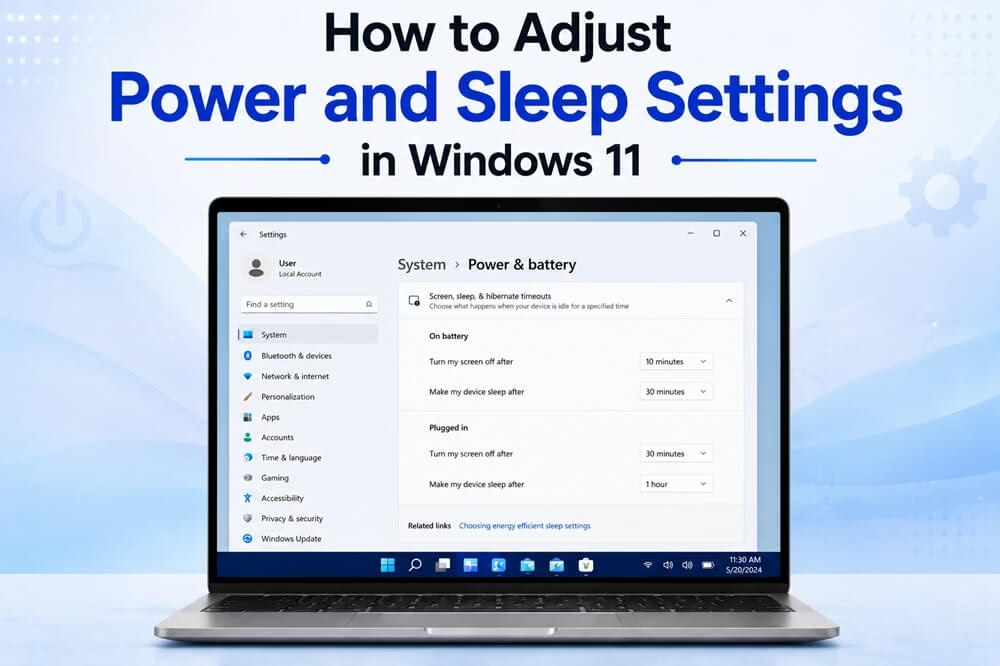
Ever had this happen? You’re just going about your work on your Windows 11 laptop, minding your own business, and then bam, one glance at the taskbar and the battery’s already sitting at 30%. Or you go make a quick coffee, walk back in, and the screen’s still glowing at full brightness like it’s got nowhere else to be, quietly draining your charge the whole time you were gone. And don’t even get started on the classic mid-download freeze, you’re transferring files or running a presentation, step away for one minute, and the laptop’s already decided it’s bedtime.
Honestly, none of this means your laptop is broken or Windows is out to get you. It’s just running on stock settings that were never built around your specific habits. And that’s the silver lining here, Windows 11 actually packs in a lot more control over power and sleep behavior than most people realize. It’s just tucked away where people don’t usually think to look.
So that’s what we’re covering below, the practical changes you can make using the current Microsoft settings, so your laptop finally starts adjusting to you instead of the other way around.
Best Ways to Adjust Power and Sleep Settings in Windows 11
Windows 11 keeps most power tools bundled in one place, but each one plays a different role. You can decide how long the screen stays lit before dimming, pick a mode that leans toward efficiency or raw speed, let the system automatically cut power at low battery, and even fine-tune what happens when you shut the lid or hit the power button. The four methods below cover this ground step by step, from the basics to a couple of settings most people never bother opening.
1. Adjust Screen and Sleep Timeouts
This is the setting most people actually need. Microsoft lets you set separate timers for when the screen turns off and when the whole device drops into sleep, with one set of values for battery power and another for when it’s plugged in. Shorter timers stretch your battery further; longer ones keep things ready if you’re only stepping away briefly.
- Hit Windows key + I to launch Settings.
- Click System in the sidebar, then Power & battery.
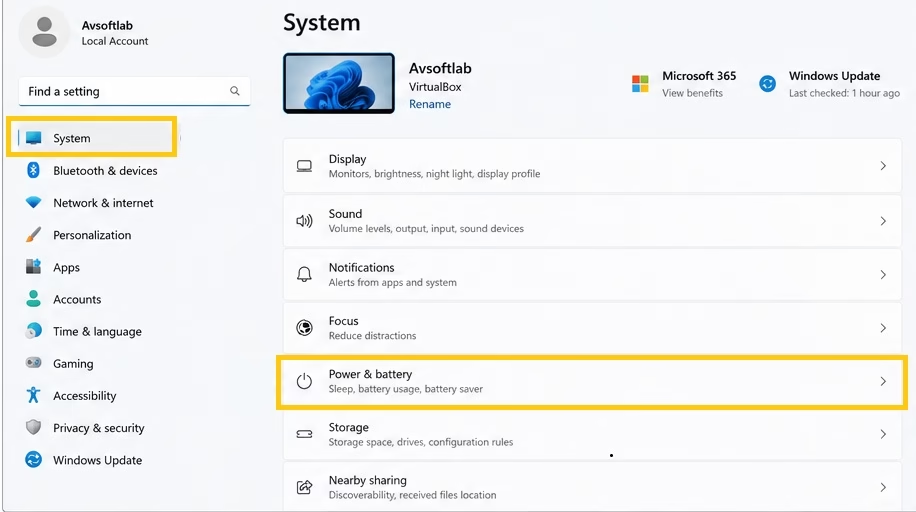
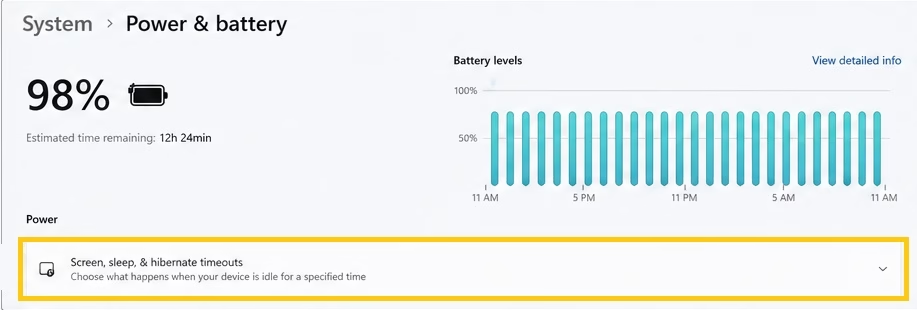
- Expand Screen, sleep, & hibernate timeouts.
- Under On battery, choose how many minutes until the screen turns off, and separately, how long until the device sleeps.
- Repeat the same two choices under Plugged in, using longer values if you like.
- Pick Never for either option if you need the screen or device to stay awake indefinitely.
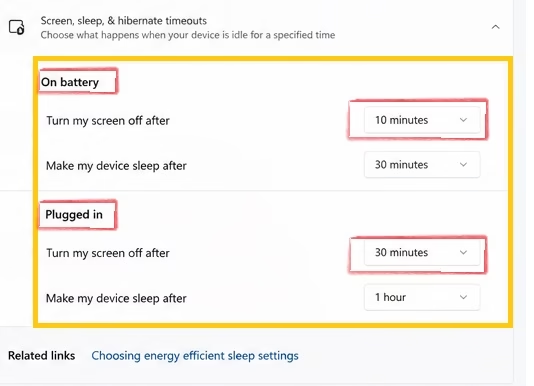
A good starting point is three to five minutes for the screen on battery, and ten to fifteen minutes before sleep kicks in. Desktops connected to power can usually stretch these much further.
Also know: Best PC Optimizer to optimize Windows PC 11/10
2. Switch Between Power Modes
Power Mode decides how aggressively your processor and background tasks run.
- Best power efficiency throttles things back to squeeze out more battery life.
- Balanced sits in the middle and works fine for most days.
- Best performance unlocks full speed, useful for gaming or heavy work when you’re near an outlet.

- In the same Power & battery page, scroll to Power mode.
- Select the option that fits what you’re doing right now: efficiency for longer runtime, balanced for general use, or performance when speed matters more than battery.
The switch takes effect right away, no restart needed. It’s worth revisiting this setting depending on the task instead of leaving it on one mode permanently.
3. Set Up Energy Saver
Energy Saver is your safety net for low-battery moments. It dims the screen and pulls back on background activity to squeeze out extra runtime. You can flip it on manually whenever you want, or set it to trigger automatically once your battery hits a certain percentage.
- From Power & battery, expand Energy saver.
- Turn it on directly if you need the extra savings immediately.
- Or set Turn Energy saver on automatically at to a threshold like 20%.
- Tick Lower screen brightness when using energy saver for additional savings.
This works especially well on laptops and tablets where you’re not always near a charger. Combine it with a shorter sleep timeout from Method 1 for the best results on long, unplugged days.
Also know: How to Get Visual Alerts Instead of Sounds in Windows
4. Fine-Tune Lid and Power Button Behavior
While Methods 1 through 3 handle the automatic side of things, this one covers what happens the moment you physically close the lid or press the power button, a setting most people never touch because it’s buried in the older Control Panel rather than the new Settings app.
- Search for Control Panel in the Start menu and open it.
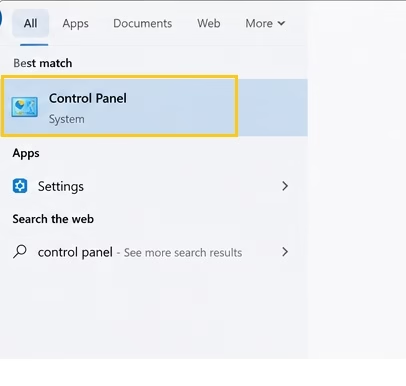
- Go to System and Security, then Power Options.
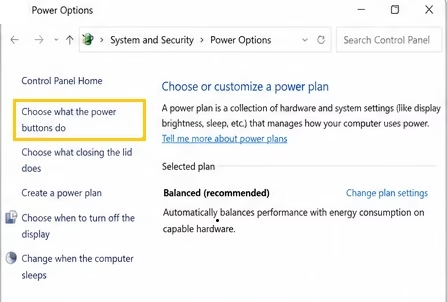
- Click Choose what the power buttons do.
- If needed, click Change settings that are currently unavailable.
- Set When I close the lid and When I press the power button separately for battery and plugged-in states, choosing from Sleep, Hibernate, Shut down, or Do nothing.
- Click Save changes.
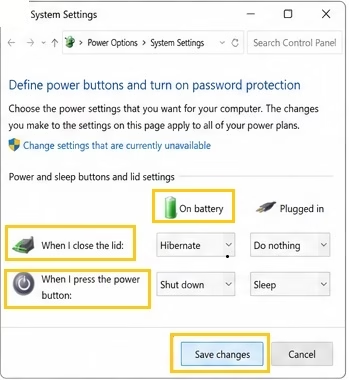
This is the layer that decides whether closing your laptop mid-download pauses everything or lets it keep running in the background, something the earlier timeout settings don’t control at all.
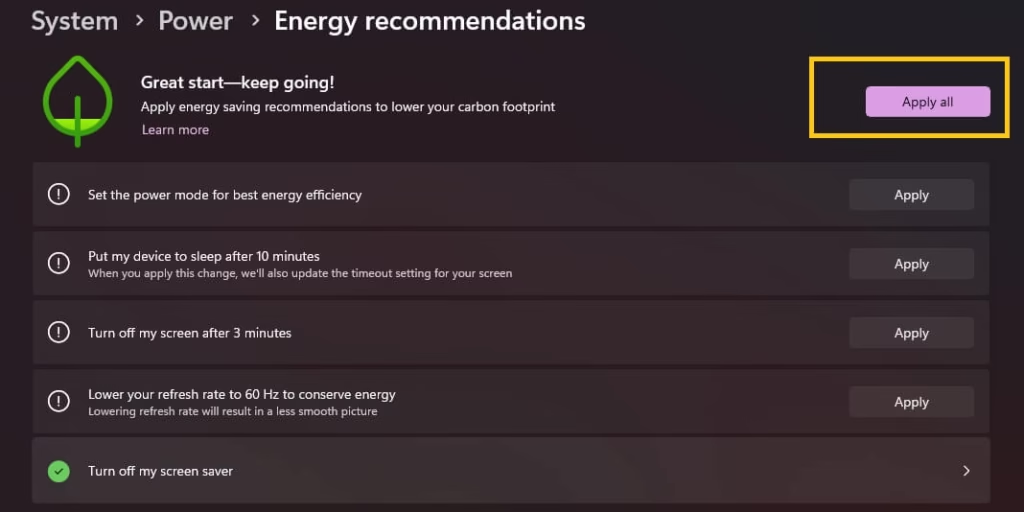
Tip: If you’d rather not configure everything manually, open Power & battery and check Energy recommendations. It applies sensible defaults for timeouts and power mode automatically, useful if you just want a quick baseline before customizing further with the methods above.
Conclusion
Getting your Windows 11 laptop to match your actual habits comes down to a handful of settings spread across two places. Screen and sleep timeouts handle the everyday behavior, power modes let you trade speed for battery life on demand, Energy Saver steps in automatically when charge runs low, and lid or power button controls decide what happens the instant you walk away. Set these once based on how you really use your device, and you’ll stop fighting a laptop that’s guessing instead of one that’s actually listening.
Related:
Add Missing Battery Icon to Taskbar to Show Battery Percentage in Windows 11
Extend Your Battery Life Effectively Windows

Amanda Starc
Amanda is a dedicated technical web content writer with a passion for transforming complex ideas into compelling and accessible online narratives. With a background in web development, and digital Marketing I bring a unique blend of technical expertise and creative storytelling to the digital domain.
