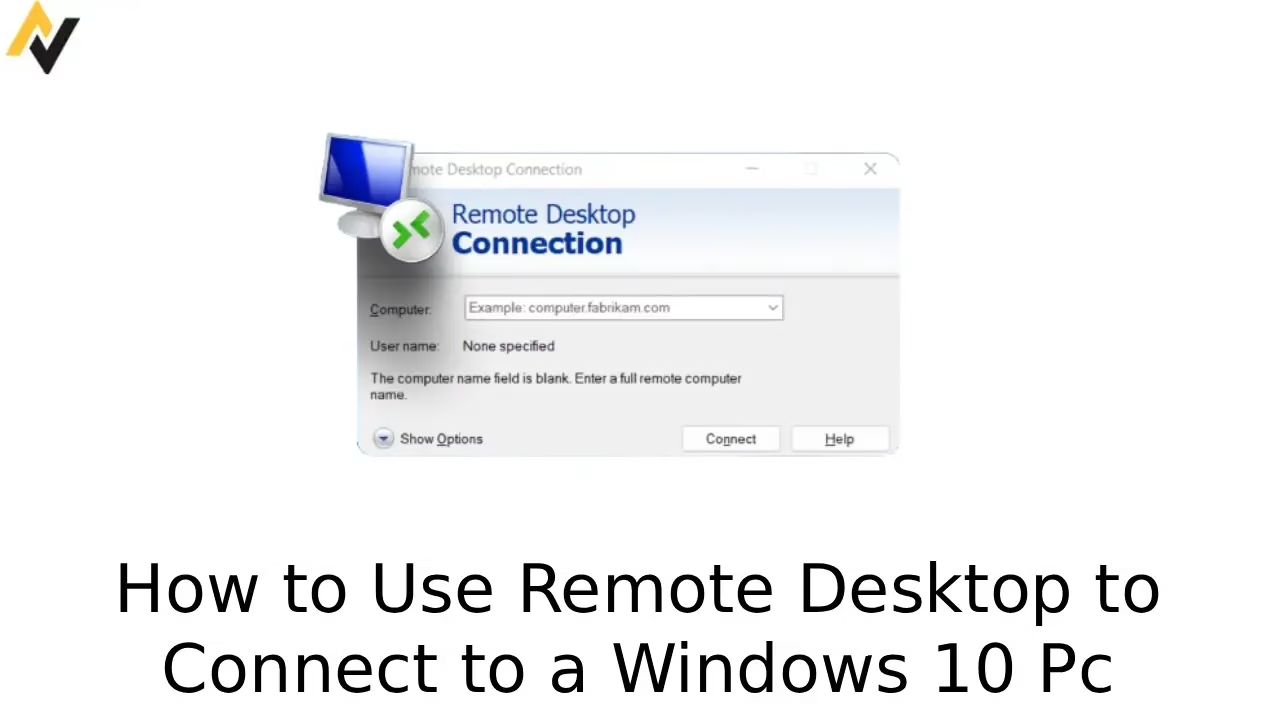
Nothing feels more frustrating than needing something important on your main Windows 10 computer while you’re miles away or even in another room. Files, programs, work projects — they’re all stuck on that one machine. Remote Desktop solves this problem beautifully. It lets you take complete control of your Windows 10 PC from another Windows computer, giving you the same experience as if you were sitting right in front of it.
In this guide, we’ll cover everything in simple, straightforward language. You’ll learn how to prepare both machines, enable the necessary settings, make secure connections, and handle common issues that pop up. Whether you’re a student, professional, or home user, these steps will help you work more flexibly. No complicated tools or paid software required. By the end, you’ll feel confident using this built-in Windows feature whenever you need it. Let’s dive in and make remote access part of your daily toolkit.
How to Use Remote Desktop to Connect to a Windows 10 PC
Remote Desktop is one of Windows’ most useful hidden gems. It transforms how you interact with your computers by allowing full remote control. You can run applications, manage files, and even troubleshoot issues on your main PC while using a laptop or another desktop elsewhere. The technology has been refined over years and remains reliable for Windows 10 users.
This feature works especially well in home offices, small businesses, or for personal tech setups. The host PC needs Windows 10 Pro or better, while the client PC is more flexible. With careful setup, connections feel smooth and responsive. Always prioritize security by using strong passwords and keeping systems updated.
The following methods break everything down clearly. Follow them in order, and you’ll have a working remote connection in no time.
Method 1: Enable Remote Desktop on the Target Windows 10 PC
Before you can connect to any computer, you must first prepare the target Windows 10 machine to accept incoming remote sessions. This step is crucial because without it, all connection attempts will fail no matter how many times you try. Enabling Remote Desktop opens specific ports and services that allow secure access while keeping your system protected. Many users skip this part or do it incorrectly, leading to hours of frustration later.
Think of this as setting up the foundation of a bridge. Once done properly, the rest becomes much easier. This process also lets you control who can connect and adds basic security layers. Take your time here. Double-check each action, especially user permissions and firewall rules. A well-configured host PC makes daily remote work seamless and worry-free. This method forms the backbone of everything that follows, so follow the steps carefully for the best results. (152 words)
Steps to Enable Remote Desktop:
- On the target PC, press Windows key + I to open Settings.
- Click System from the list.
- Scroll down the left sidebar and select Remote Desktop.
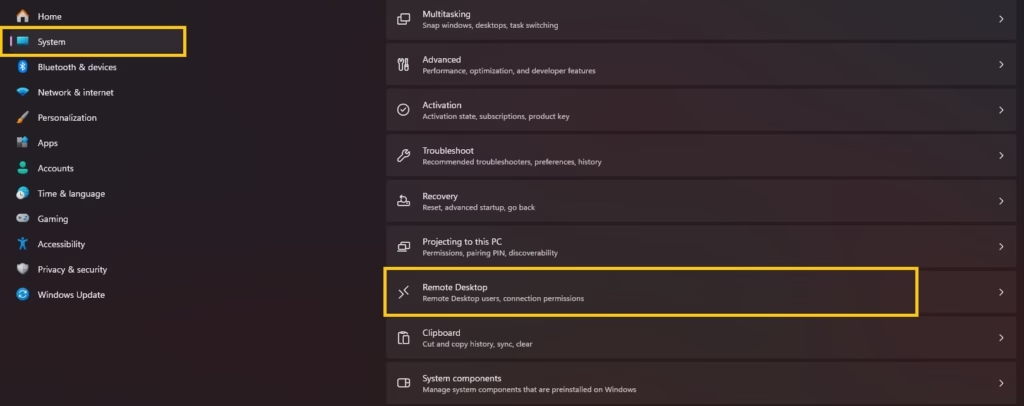
- Toggle Enable Remote Desktop to On.
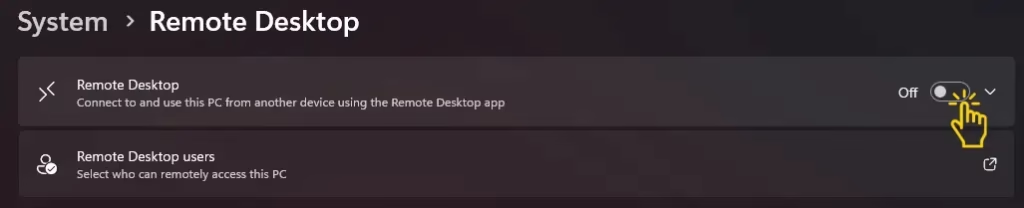
- Click Confirm in the dialog box that appears.
- Allow any firewall prompts to ensure proper access.
- In the User accounts section, click Select users and add permitted accounts.
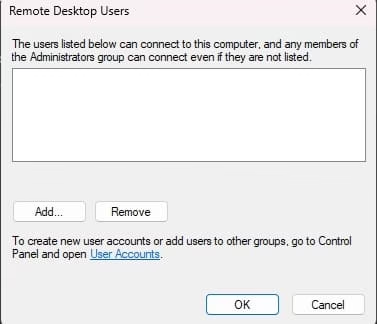
- Note the PC name displayed on this page — copy it exactly.
Also know: How to Fix WASD and Arrow Keys SWAP
Method 2: Connect Using the Built-in Remote Desktop Connection App
Once the target PC is ready, it’s time to establish the actual connection from your client computer. The built-in Remote Desktop Connection app is a classic choice that has been part of Windows for years. It offers solid performance and plenty of customization without needing any downloads. This method feels familiar to longtime Windows users and works reliably across different network conditions.
Many people prefer it for quick, one-time connections because it launches fast and doesn’t require extra installations. You can adjust display quality, share local resources like printers and drives, and even save connection settings for future use. It strikes a great balance between simplicity and control. If you want a no-fuss experience that gets the job done efficiently, this is often the best starting point. The interface may look basic, but the power behind it is impressive. Follow these steps to create your first successful remote session. (148 words)
Steps to Connect Using Remote Desktop Connection App:
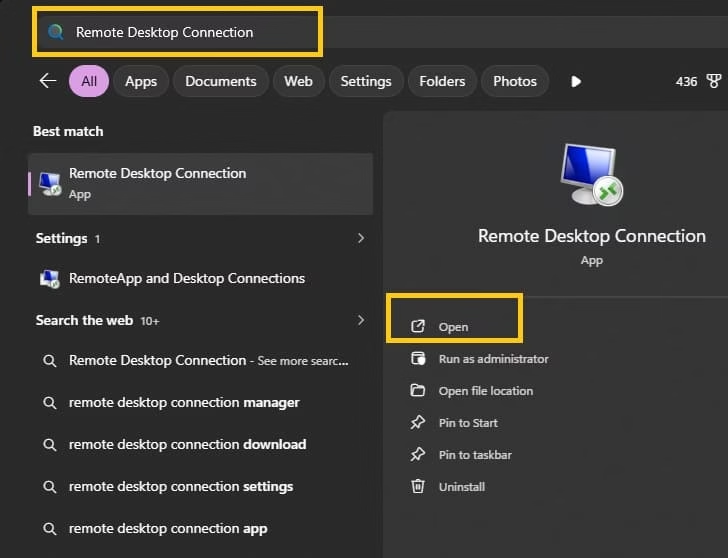
- On your client PC, search for “Remote Desktop Connection” in the taskbar and open it.
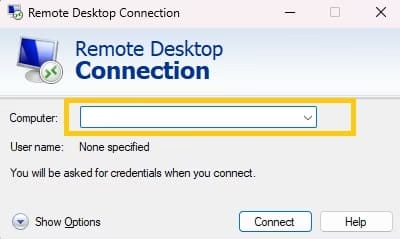
- Type the target PC’s name or IP address in the Computer field.
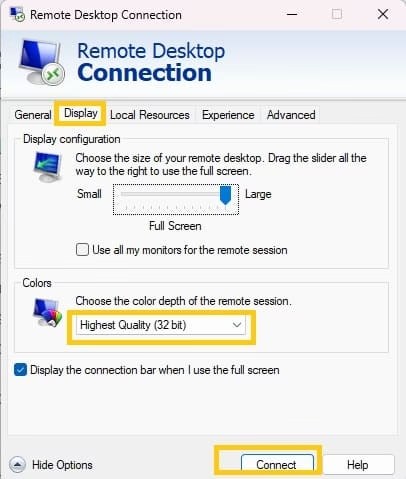
- Click Show Options to reveal advanced settings.
- In the Display tab, select your preferred screen resolution or full screen mode.
- Go to Local Resources and choose items to share (clipboard, drives, printers, sound).
- Click Connect.
- Enter the username and password for the target PC.
- Click OK and wait for the session to load.
Also know: How to Fix Lag on Pc While Working and Gaming
Method 3: Connect Using the Windows App
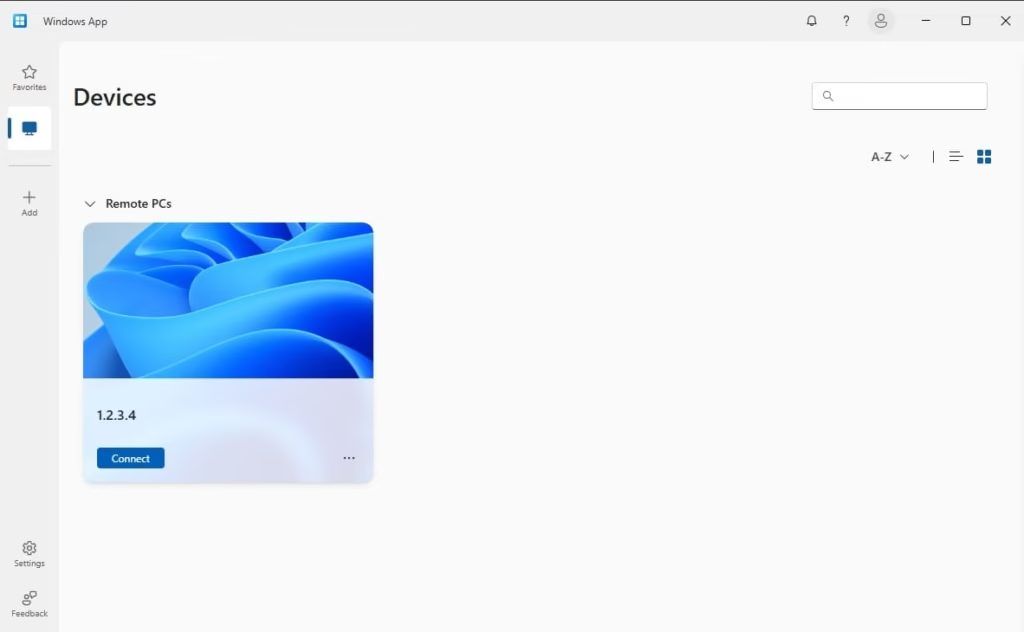
For a more modern and polished experience, use the Windows App (available in the Microsoft Store). This is the current replacement for the older Microsoft Remote Desktop app. It offers a cleaner interface, better organization for multiple saved connections, and improved features for regular users. It’s especially helpful if you switch between different PCs often or want easier management of connection settings.
The app feels more contemporary and includes handy options like quick account switching and enhanced display controls. Many users find it more intuitive for daily workflows. It performs well on various Windows versions and provides consistent results. If you value convenience and a fresh look, this method will quickly become your favorite. The setup takes only a few minutes but pays off with smoother, more reliable sessions over time. Here’s exactly how to get it working.
Steps to Connect Using Windows App:
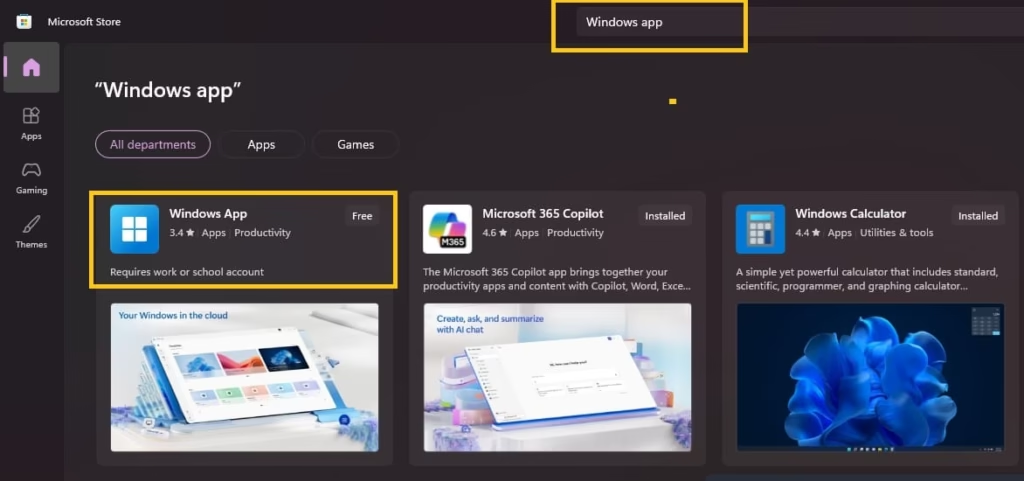
- Open the Microsoft Store on your client PC.
- Search for “Windows App” and install the official app (published by Microsoft).
- Launch the app after installation.
- Click the + button (or Add / Add PC).
- Enter the target PC name or IP address.
- Add and save your username and password (optional but recommended for saved connections).
- Customize resolution, color settings, and device redirection options as needed.
- Save the connection for easy access later.
- Double-click (or select) the saved connection to start your remote session.
Conclusion
Remote Desktop gives you real flexibility with your Windows 10 computers. With the methods above, you now have clear, reliable ways to set up remote access. Start on your local network, practice, and then expand. Stay secure, keep Windows updated, and enjoy the freedom this powerful feature provides.
FAQs
Q1. Which Windows 10 editions support Remote Desktop as host?
Only Pro, Enterprise, and Education editions allow incoming Remote Desktop connections. The Home edition does not support hosting.
Q2. Can I connect from Windows 11 to Windows 10?
Yes, you can connect smoothly from a Windows 11 computer to a Windows 10 PC using the standard client tools.
Q3. Is Remote Desktop safe over the internet?
It can be reasonably safe when you use strong passwords and keep Windows updated. For better protection when connecting from outside your network, using a VPN is highly recommended.
Q4. Why can’t I find Remote Desktop in Settings?
This option is missing if you are using Windows 10 Home edition, which does not include the ability to host remote connections.
Q5. Do both PCs need internet?
No. Local network connections only require the two devices to communicate with each other. An internet connection is necessary only when you want to connect from a remote location outside your home or office network.

