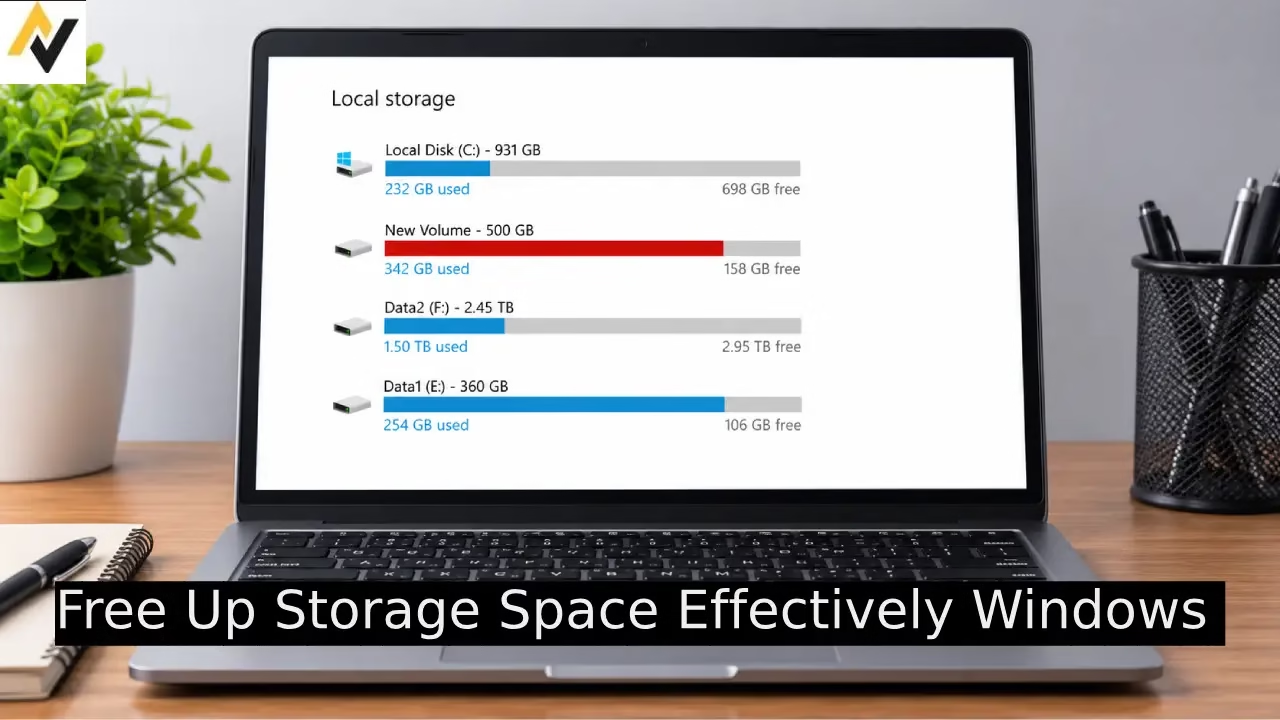
Running low on storage turns a smooth Windows experience into a slog. Updates stall, apps lag, and you get those low disk space warnings that interrupt everything. Temporary files, leftover update data, unused apps, and forgotten downloads pile up quietly on both Windows 11 and Windows 10. This guide walks through the most reliable built-in tools and settings Microsoft provides so you can free up storage space effectively Windows without risky third-party software. Everything here draws from official Microsoft support documentation so the steps stay current and safe. You will clear clutter, reclaim gigabytes, and keep your system running cleaner going forward.
How to Free Up Storage Space Effectively Windows: Best working Methods
These approaches work on both Windows 11 and Windows 10 with only minor menu differences. Start with the automated options. They require the least effort and often free the most space quickly.
1. Turn On and Configure Storage Sense
Storage Sense runs in the background and removes temporary files, empties the Recycle Bin after a set time, and can even make rarely used OneDrive files online-only. Microsoft designed it to keep the system drive healthy without constant manual work. Many users leave it off by default, so turning it on and setting sensible rules gives lasting relief. It only acts on the system drive (usually C:), which is where Windows itself lives and where space pressure hurts most.
- Open Settings (Windows key + I).
- Select System, then Storage.
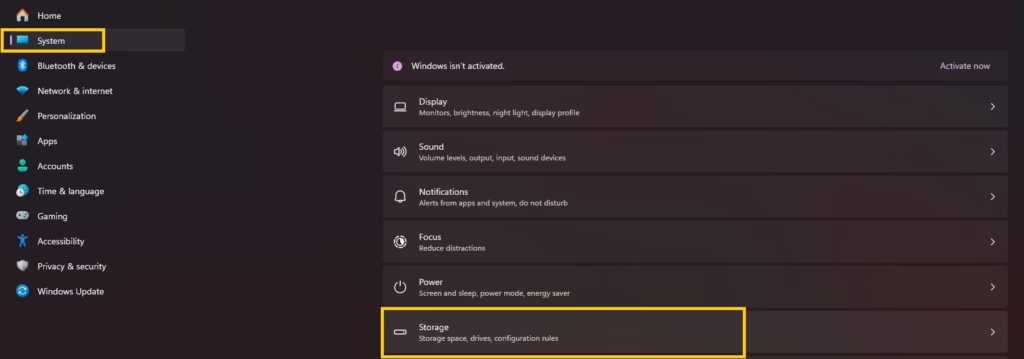
- Switch Storage Sense to On.
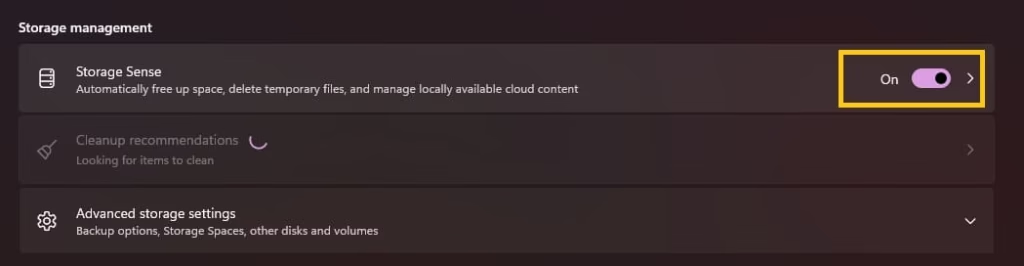
- Click the Storage Sense entry to open its settings.
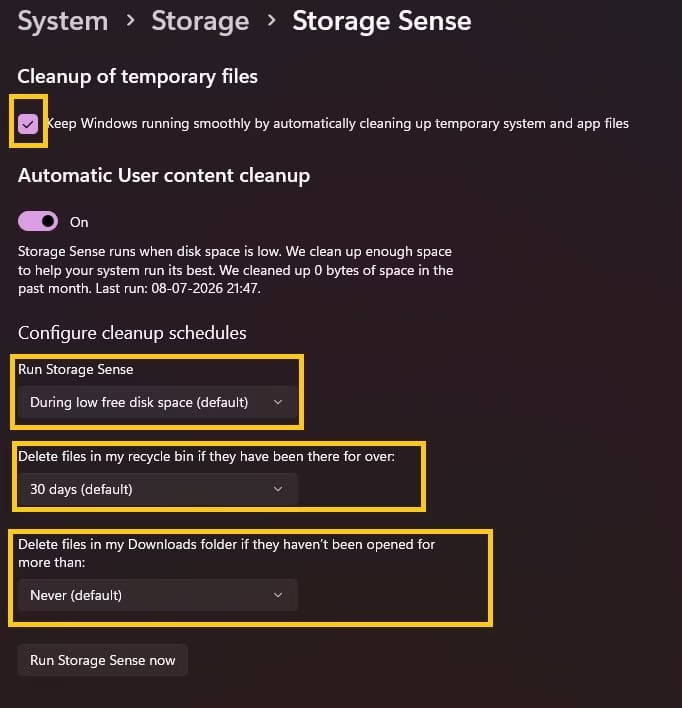
- Under Run Storage Sense, choose Every week or During low free disk space.
- Check the box that lets it clean temporary system and app files.
- Set Recycle Bin cleanup to 14 or 30 days.
- Optionally set Downloads folder cleanup to 30 or 60 days for files you have not opened.
- If you use OneDrive, adjust the cloud content threshold so older local copies become online-only.
- Scroll down and select Run Storage Sense now if you want an immediate cleanup.
After it finishes, return to This PC in File Explorer and note the new free space figure.
Also know: DPC Watchdog Violation (0x00000133): Meaning and Fixes
2. Use Cleanup Recommendations
Cleanup recommendations scan your drive and surface the biggest safe targets: temporary files, large or unused items, cloud-synced files that still sit locally, and apps you rarely open. Microsoft surfaces the exact size you will regain for each choice so you stay in control. This tool appears on both Windows 11 and recent Windows 10 builds and often recovers several gigabytes in one pass.
- Open Settings > System > Storage.
- Under Storage management, select Cleanup recommendations.
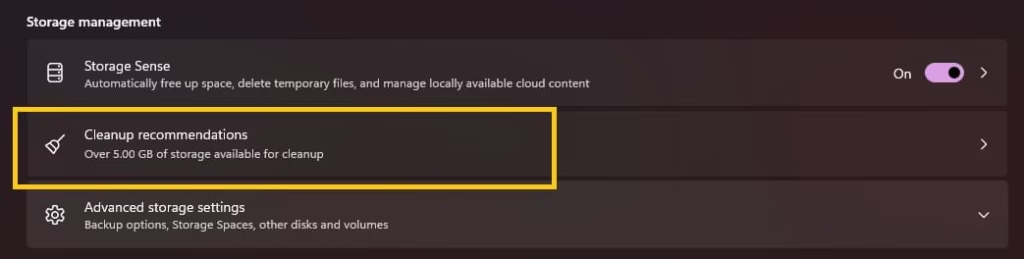
- Expand Temporary files. Review the list (Windows Update Cleanup, previous Windows installations if present, temporary files, Recycle Bin, and others). Check the boxes you want removed.
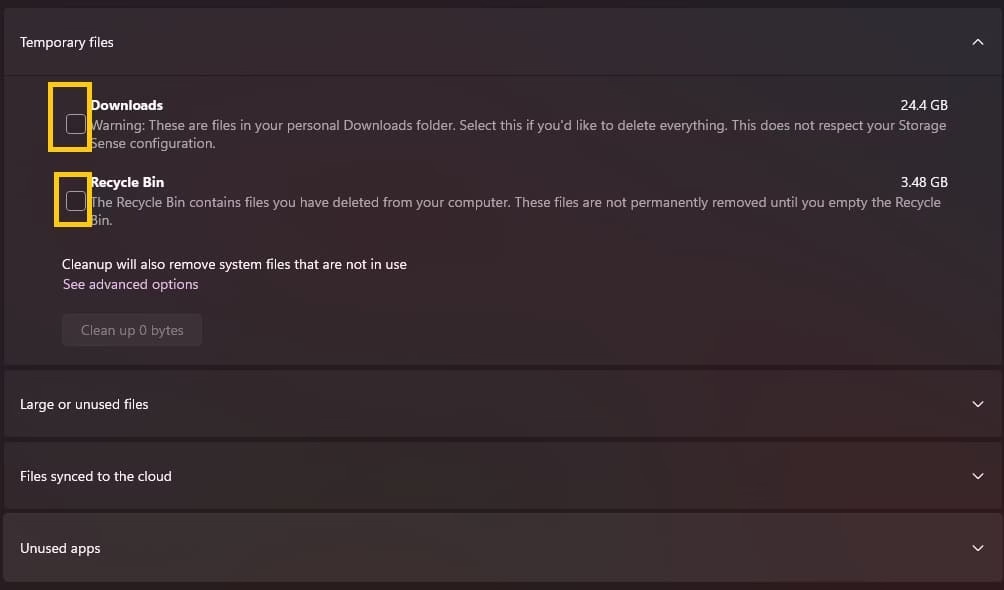
- Select Clean up for that section.
- Move to Large or unused files. Select items you no longer need and clean them.
- Check Files synced to the cloud. Remove local copies of files already safely stored online.
- Review Unused apps. Uninstall anything you have not opened in months.
- Confirm each clean-up action.
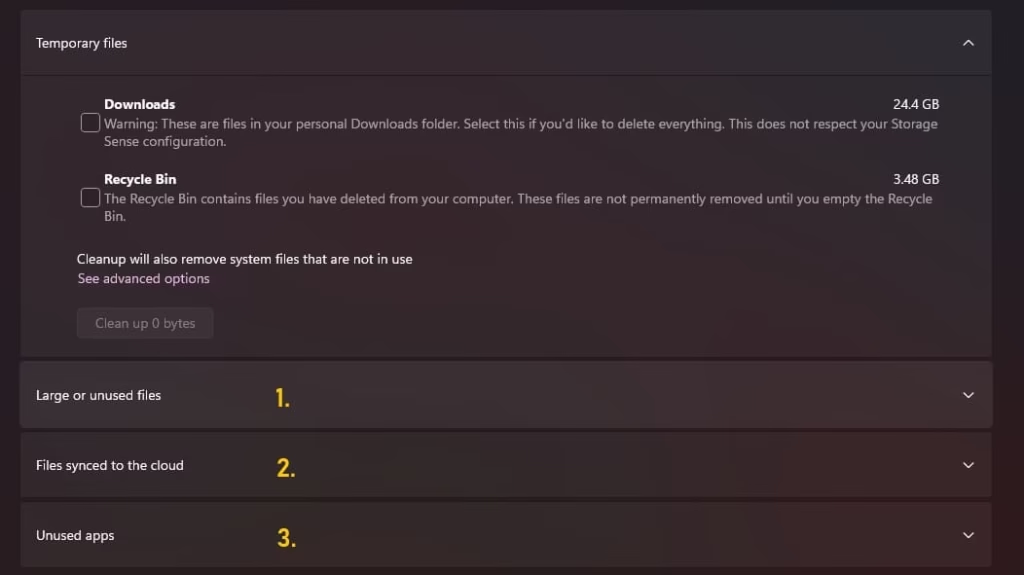
Windows shows the space recovered after every section. Repeat if more appears later.
3. Run Disk Cleanup for System Files
Disk Cleanup remains a reliable classic tool that reaches deeper system files Storage Sense sometimes leaves behind. Running it as administrator unlocks previous Windows installations, update leftovers, and system error memory dumps. Microsoft still lists it as a primary free-space method for both Windows 11 and Windows 10.
- Type Disk Cleanup in the search box and open it.
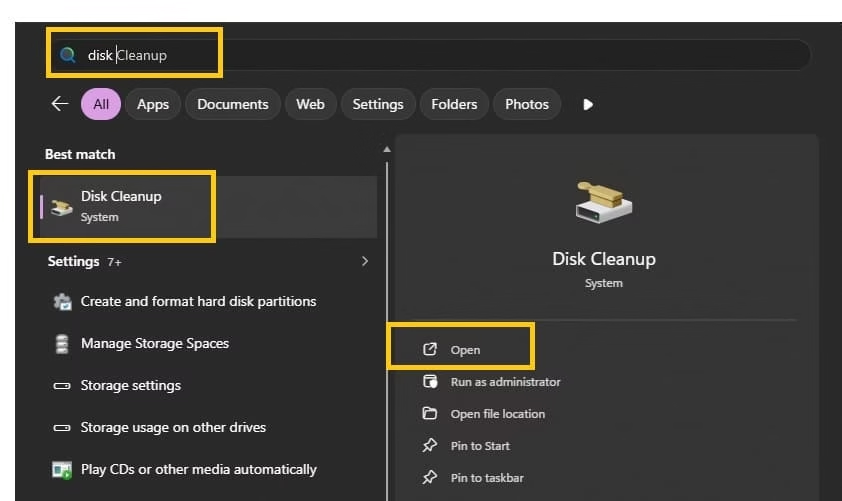
- Choose the system drive (usually C:) and select OK.
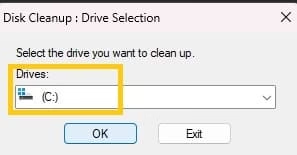
- Click Clean up system files and select the drive again.
- Wait for the scan to finish.
- Check boxes for Windows Update Cleanup, Temporary files, Recycle Bin, Thumbnails, and any Previous Windows installation(s) if you are sure you will not roll back.
- Note the total size shown.
- Select OK and confirm permanent deletion.
The process can take several minutes when large update caches are present. Check free space afterward.
4. Clear Temporary Files Directly from Settings
Temporary files accumulate from apps, browsers, and Windows itself. The Storage page gives a clean view of exactly what sits in that category so you can remove them without guessing. This method is quick and works the same way on Windows 11 and Windows 10.
- Go to Settings > System > Storage.
- Select Temporary files (or Show more categories if needed).

- Review the listed items: Temporary files, Windows Update Cleanup, Delivery Optimization files, Thumbnails, and others.
- Check the ones you want to remove.
- Select Remove files.
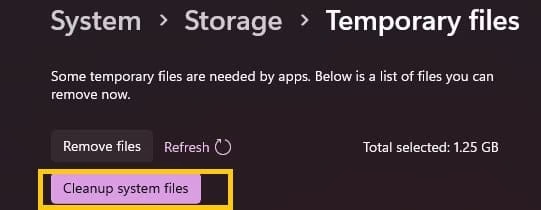
Confirm the action. Space appears almost immediately.
Also know: Extend Your Battery Life Effectively Windows with 17 Unique Ways
5. Uninstall Unused Apps and Programs
Installed programs and Microsoft Store apps often claim more space than users realize, especially games, creative suites, and older utilities. Sorting by size reveals the heaviest offenders. Removing them also deletes associated data in most cases.
- Open Settings > Apps > Installed apps (Windows 11) or Apps & features (Windows 10).
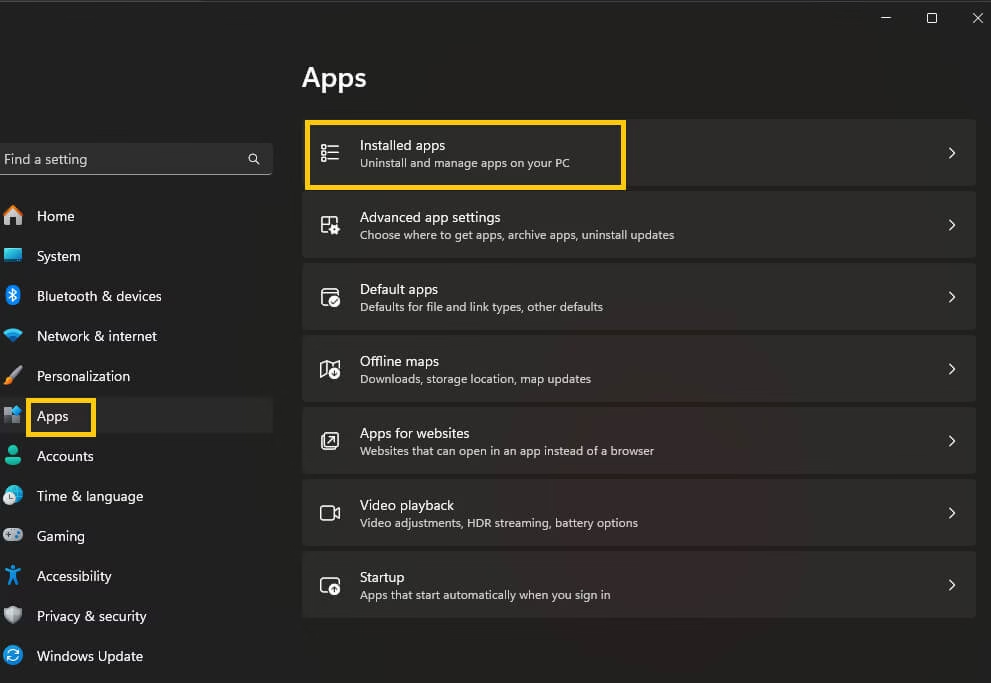
- Sort the list by Size.
- Select any program you no longer use.
- Choose Uninstall and follow the prompts.
- Restart the PC if prompted.
For stubborn leftover folders, check Program Files and the user AppData folders after uninstallation, but only delete what you recognize as belonging to the removed app.
6. Empty the Recycle Bin and Tidy the Downloads Folder
Deleted files stay in the Recycle Bin and continue using space until you empty it. The Downloads folder collects installers, PDFs, and media that many people never revisit. Clearing both is one of the fastest manual wins.
- Right-click the Recycle Bin on the desktop and select Empty Recycle Bin. Confirm.
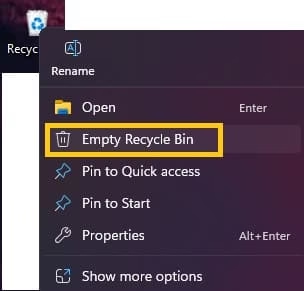
- Open File Explorer and go to Downloads.
- Sort by Date modified or Size.
- Select and delete files you no longer need.
- Empty the Recycle Bin again afterward.
You can also let Storage Sense handle future cleanups automatically.
7. Move Large Personal Files to External Storage or the Cloud
Photos, videos, music libraries, and document archives often occupy the bulk of personal space. Moving them off the system drive frees room without deletion. External USB drives, SD cards, or OneDrive work well.
- Connect an external drive.
- Open File Explorer and navigate to Videos, Pictures, Music, or Documents.
- Select large folders or files, cut them, and paste them onto the external drive.
- For cloud options, sign in to OneDrive, move files into the OneDrive folder, and wait for upload.
- Once confirmed, delete the local copies if desired.
OneDrive Files On-Demand keeps placeholders on the drive while the full files stay in the cloud, saving local space automatically.
8. Use iolo System Mechanic for Deeper Cleanup
After the built-in Windows tools have done their work, some users still want a more thorough scan that catches extra junk files, browser leftovers, and registry clutter. iolo System Mechanic is a long-standing PC optimization suite that includes strong disk-cleaning features. Its PC Cleanup tool targets over fifty types of temporary and leftover files, and the SmartScan can surface additional space-hogging items that the native Windows options sometimes miss. It also offers automated ActiveCare that runs when the PC is idle.
- Download System Mechanic from the official iolo website and install it.
- Launch the program and open the Cleanup or All-in-One Cleanup section.
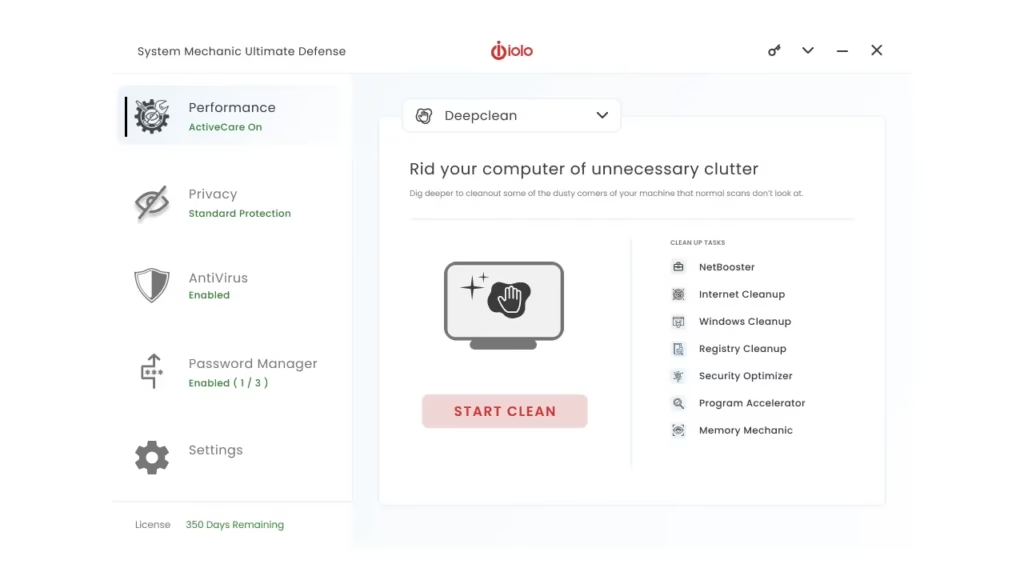
- Review the categories (Windows junk, internet files, temporary data, and others).
- Select Analyze or Scan to let it find reclaimable files.
- Check the results carefully, then choose to remove the selected items.
- Optionally enable ActiveCare so future cleanups happen automatically in the background.
Always create a system restore point before running any third-party cleaner. Start with the free or trial version to test how much space it recovers on your machine. Many people use it as a supplement rather than a full replacement for the Microsoft tools above.
Optional Advanced Step: Disable Hibernation
Hibernation creates a large hiberfil.sys file roughly equal to installed RAM. If you rarely use hibernate and prefer sleep or shut down, turning it off reclaims that space. Microsoft supports the command for this purpose.
- Search for Command Prompt, right-click it, and choose Run as administrator.
- Type powercfg /hibernate off and press Enter.
- Close the window.
The file disappears and free space increases by several gigabytes on most systems. Re-enable later with powercfg /hibernate on if needed.
Conclusion
Running out of storage on Windows 11 or Windows 10 does not require expensive upgrades or risky software. The built-in tools Microsoft provides (Storage Sense, Cleanup recommendations, Disk Cleanup, and the Storage settings page) handle the majority of everyday clutter. Start with Storage Sense for ongoing protection, then use the manual cleaners for immediate gains. Move large personal files off the system drive and remove apps you no longer open. Check free space after each major step. Most users regain enough room for updates and smooth performance within a short session. Make Storage Sense part of your regular maintenance and the problem stays under control.
FAQs
Q1. How often should I run these cleanups?
Enable Storage Sense to run weekly or when space runs low. Manually check Cleanup recommendations and Disk Cleanup every few months or whenever free space drops below 15–20 percent of the drive.
Q2. Will deleting temporary files or previous Windows installations cause problems?
Temporary files and update leftovers are safe to remove. Deleting a previous Windows installation (Windows.old) is permanent and removes the ability to roll back an upgrade. Only do that after you confirm the new version runs well.
Q3. Can I free space on drives other than C:?
Storage Sense focuses on the system drive. For secondary drives open Settings > System > Storage > Advanced storage settings > Storage used on other drives, or simply delete and move files manually through File Explorer.

Amanda Starc
Amanda is a dedicated technical web content writer with a passion for transforming complex ideas into compelling and accessible online narratives. With a background in web development, and digital Marketing I bring a unique blend of technical expertise and creative storytelling to the digital domain.
