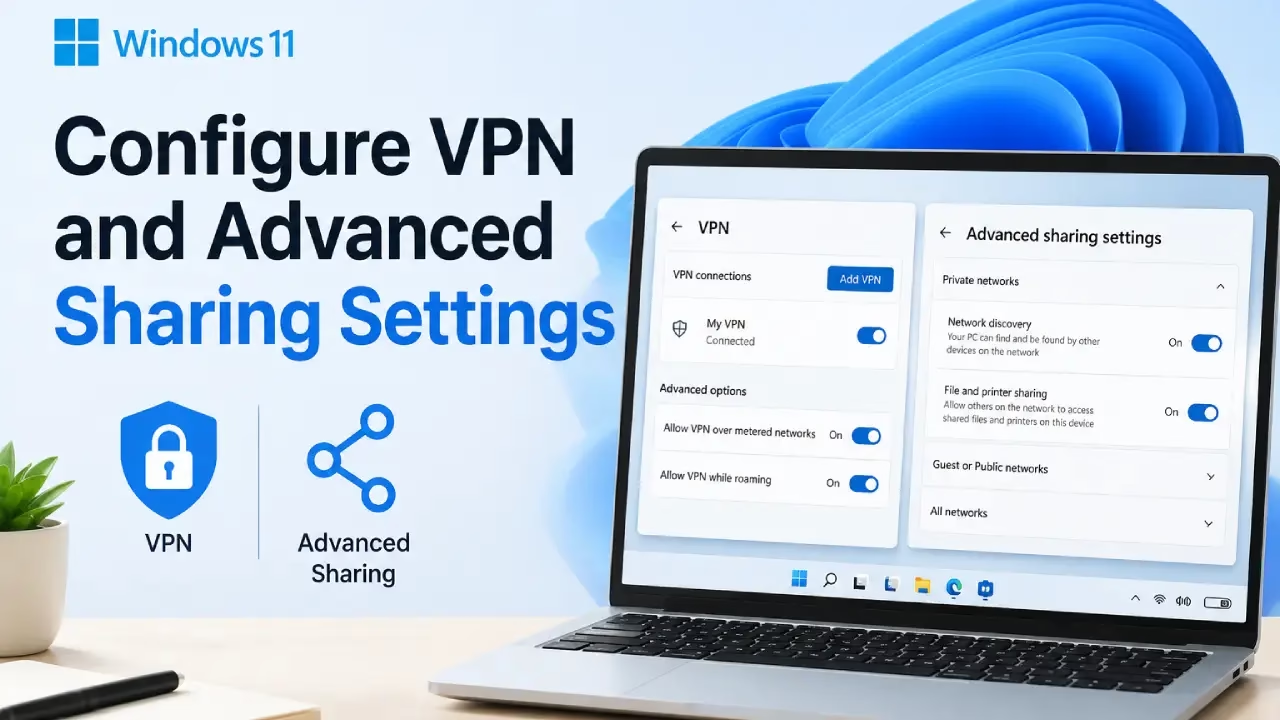
Public Wi-Fi and home networks both carry risks. Without protection your traffic stays open to interception, and without careful sharing controls your files become visible to the wrong people. Windows 11 gives you built-in tools for both. A VPN encrypts your connection so data travels safely even on untrusted networks. Advanced sharing settings let you decide exactly who can see or access folders and printers on your local network.
This article shows you how to set up a VPN connection and fine-tune advanced sharing settings using only the options Microsoft provides. The steps stay simple, accurate, and safe so you can protect privacy while still sharing what you need.
How to Configure VPN and Advanced Sharing Settings in Windows 11
The tools live under Network & internet in Settings. You can create a VPN profile once and connect whenever you need it. Sharing settings work best when you treat private and public networks differently. Follow the sections below in order for the cleanest results.
1. Create a VPN Connection in Windows 11
A virtual private network creates an encrypted tunnel between your device and a remote server. Windows 11 supports several protocols including IKEv2, SSTP, L2TP/IPsec, and PPTP. Most personal and work VPNs work with the built-in provider. You only need the server address and sign-in details from your VPN service or company.
- Open Settings and select Network & internet.
- Choose VPN then select Add VPN.
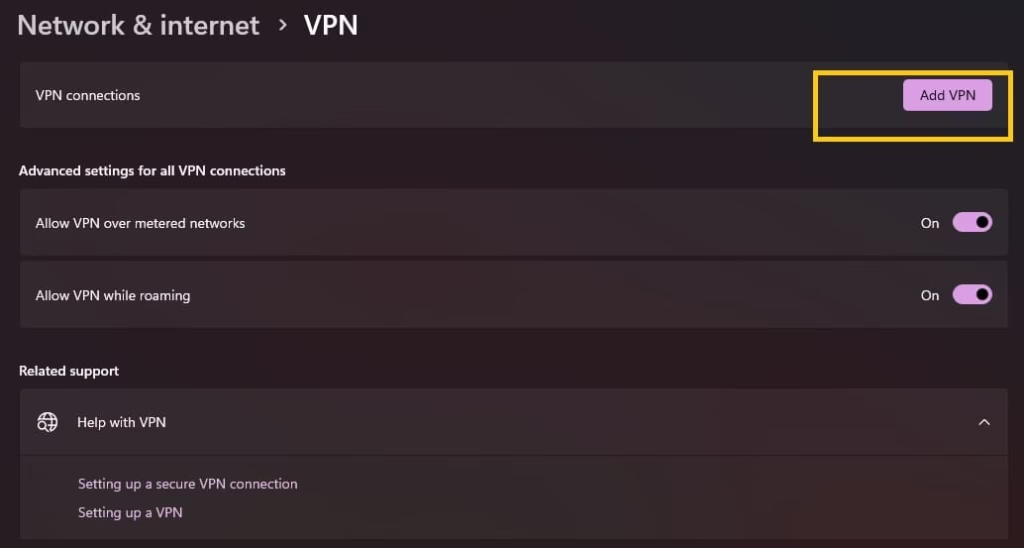
- Set VPN provider to Windows (built-in).
- Type a clear connection name you will recognize later, such as Work VPN or Home Secure.
- Enter the server name or address provided by your service.
- Select the VPN type that matches your provider. Automatic often works, but choose IKEv2 or SSTP when those are recommended for better security.
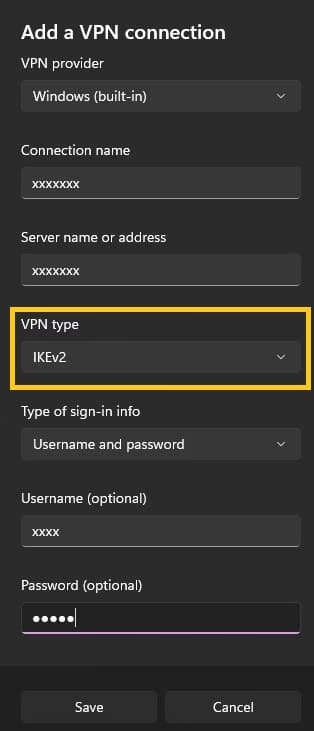
- Pick the type of sign-in info, usually username and password. Enter the credentials if required.
- Check Remember my sign-in info if you want the details saved.
- Select Save.
The new profile now appears on the VPN page. You can edit it later by selecting Advanced options next to the connection.
Also know: Youtube Unblocked: How to Use Youtube Everywhere
2. Connect to and Manage Your VPN
Once the profile exists, connecting takes only a moment. You can start it from Settings or the taskbar for faster access. Windows also lets you view connection details and disconnect cleanly.
- Go to Settings > Network & internet > VPN.
- Find your connection and select Connect. Enter credentials if prompted.
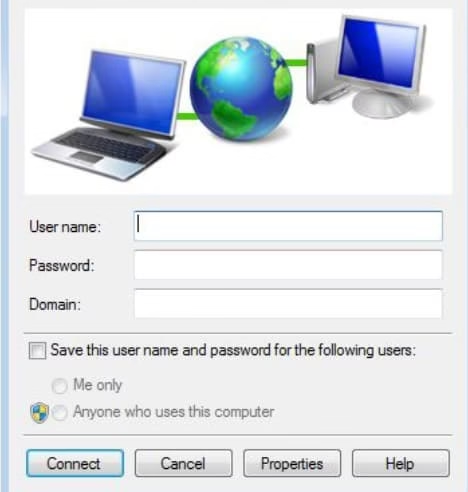
- To connect from the taskbar, select the network icon, choose VPN, and turn the connection on.
- When finished, select Disconnect on the same page or from the taskbar.
- For extra options, select the connection then Advanced options to review properties, proxy settings, or edit the profile.
A successful connection shows the connected status and often displays a lock icon. Test by visiting a site that shows your IP address. It should match the VPN server location rather than your real one.
3. Open and Understand Advanced Sharing Settings
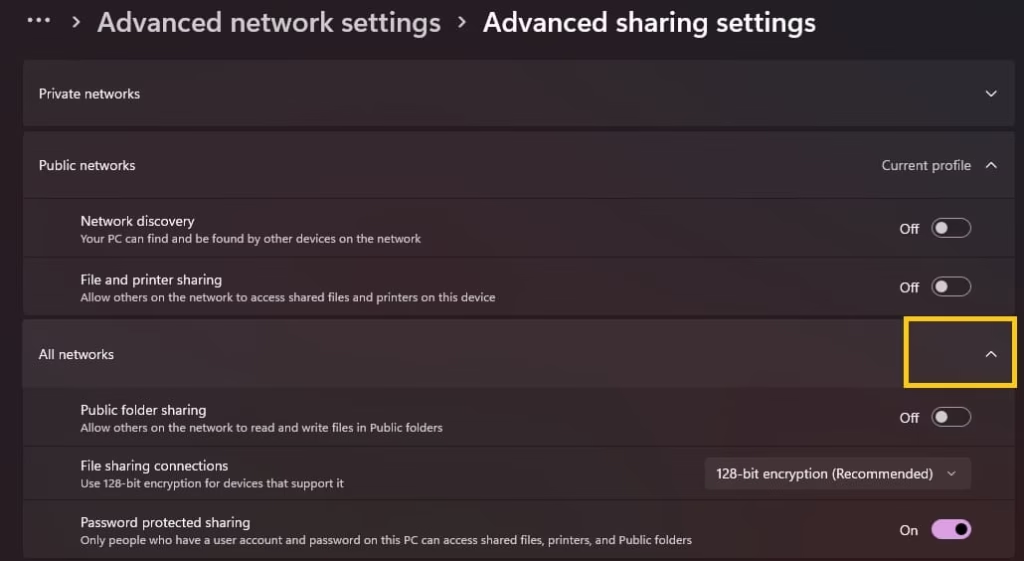
Advanced sharing settings control network discovery, file and printer sharing, and password protection. Windows separates these options by network profile so private (trusted) networks can stay open while public networks stay locked down. Changing the wrong profile can leave your PC exposed on café Wi-Fi or open your home files to guests.
- Open Settings and go to Network & internet.
- Select Advanced network settings.
- Choose Advanced sharing settings.
- You will see sections for Private networks, Public networks, and All networks. Expand each one to view the toggles.
4. Turn On Network Discovery and File and Printer Sharing
Network discovery lets your PC see other devices and appear to them. File and printer sharing allows those devices to reach shared folders or printers. Keep these on only for private networks you trust.
- Under Private networks, turn Network discovery On.
- Turn File and printer sharing On in the same section.
- Under Public networks, leave both options Off for safety.
- Close the settings. Changes apply immediately.
If devices still do not appear, confirm every PC is set to the Private network profile. You can check this under Network & internet by selecting your current connection.
5. Manage Password Protected Sharing
Password protected sharing requires users to enter a Windows account name and password before they can open shared folders. Turning it off lets anyone on the network access shares without credentials. Use the off setting only on small, fully trusted home networks.
- In Advanced sharing settings, expand All networks.
- Find Password protected sharing.
- Turn it On if you want extra security or Off if you prefer open access on a private network.
- Save or simply close the window.
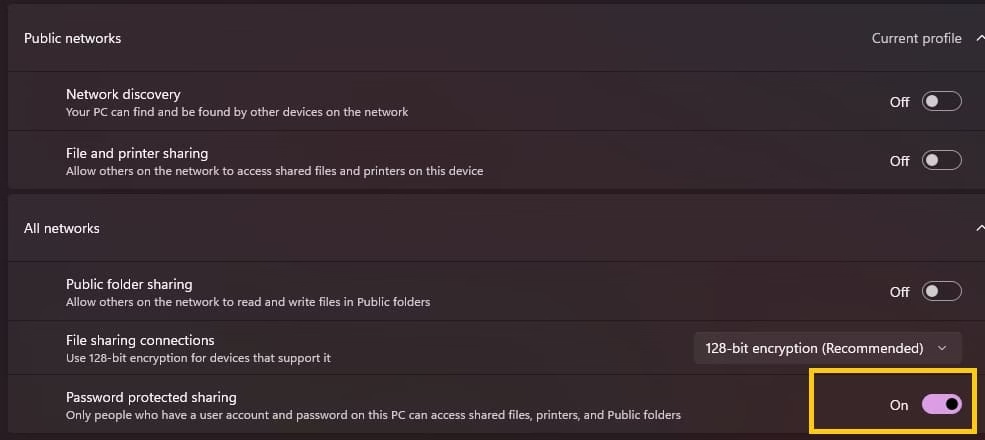
When password protection stays on, other users need an account that exists on your PC or a matching Microsoft account. Create a local guest-style account if you want limited access without giving full admin rights.
6. Share a Specific Folder with Advanced Options
After the network settings are ready, you can share individual folders and set precise permissions. This gives more control than the simple Share button.
- Open File Explorer and locate the folder.
- Right-click the folder and select Properties.
- Go to the Sharing tab and select Advanced Sharing.
- Check Share this folder.
- Optionally change the share name.
- Select Permissions to choose who can access it. Add Everyone or specific users and set Read, Change, or Full Control.
- Apply the changes and close the windows.
The folder now appears under Network on other PCs that have discovery enabled. You can stop sharing later by returning to the same dialog and clearing the Share this folder box.
Also know: 192.168.1.1 Admin: Log in & Troubleshooting Guide
Extra Tips for Smooth VPN and Sharing Use
Keep Windows updated so the latest security fixes reach both VPN and sharing features. Set your home Wi-Fi to Private and public hotspots to Public every time you connect. If a VPN fails to connect, double-check the server address and protocol, then try reconnecting after a restart. For sharing problems, restart the Function Discovery and SSDP services through the Services app if devices stay hidden.
These built-in tools cover most everyday needs without extra software. A correctly set VPN protects traffic on the go, while carefully tuned sharing settings let you move files safely at home.
Conclusion
VPN and advanced sharing settings in Windows 11 give you practical control over privacy and local access. Creating a VPN profile takes only a few minutes and works with most providers. Advanced sharing settings let you open discovery and file sharing on private networks while keeping public ones locked. Adding password protection and folder-level permissions adds another layer of safety.
Use the steps above to set both features once, then adjust them as your network changes. Regular checks keep your connection secure and your shared resources limited to the people you trust. With these Microsoft tools in place, Windows 11 handles everyday security and sharing needs cleanly and reliably.
FAQs
Q1. Which VPN type should I choose in Windows 11?
Select the protocol your VPN provider recommends. IKEv2 and SSTP offer strong security and good compatibility. Automatic works for many services, but avoid older options like PPTP when stronger choices are available.
Q2. Why can other devices not see my shared folders?
Confirm network discovery and file sharing are turned on under Private networks. Make sure every PC uses the Private network profile. Password protected sharing may also block access until users enter the correct credentials.
Q3. Is it safe to turn off password protected sharing?
Only on a fully trusted private home network where every device belongs to people you know. Leave it on for any network that includes guests or devices you do not fully control.

Amanda Starc
Amanda is a dedicated technical web content writer with a passion for transforming complex ideas into compelling and accessible online narratives. With a background in web development, and digital Marketing I bring a unique blend of technical expertise and creative storytelling to the digital domain.
