Are you frustrated by constant pings and alerts? They can quickly disrupt your workflow and make it harder to stay focused. Whether you’re managing work deadlines, creative projects, or family time, controlling how you receive and interact with notifications can make a significant difference. By customizing notifications and Quick Settings in Windows 11, you can reduce distractions, improve productivity, and create a PC experience that fits your unique routine.
In this guide, we’ll explore practical and unique approaches beyond basic toggles. You’ll discover ways to personalize alert behavior, sounds, positioning, and more. We’ll also dive into refreshing the quick settings panel for instant access to the tools you actually use. By the end, your Windows 11 experience will feel more intuitive and less intrusive.
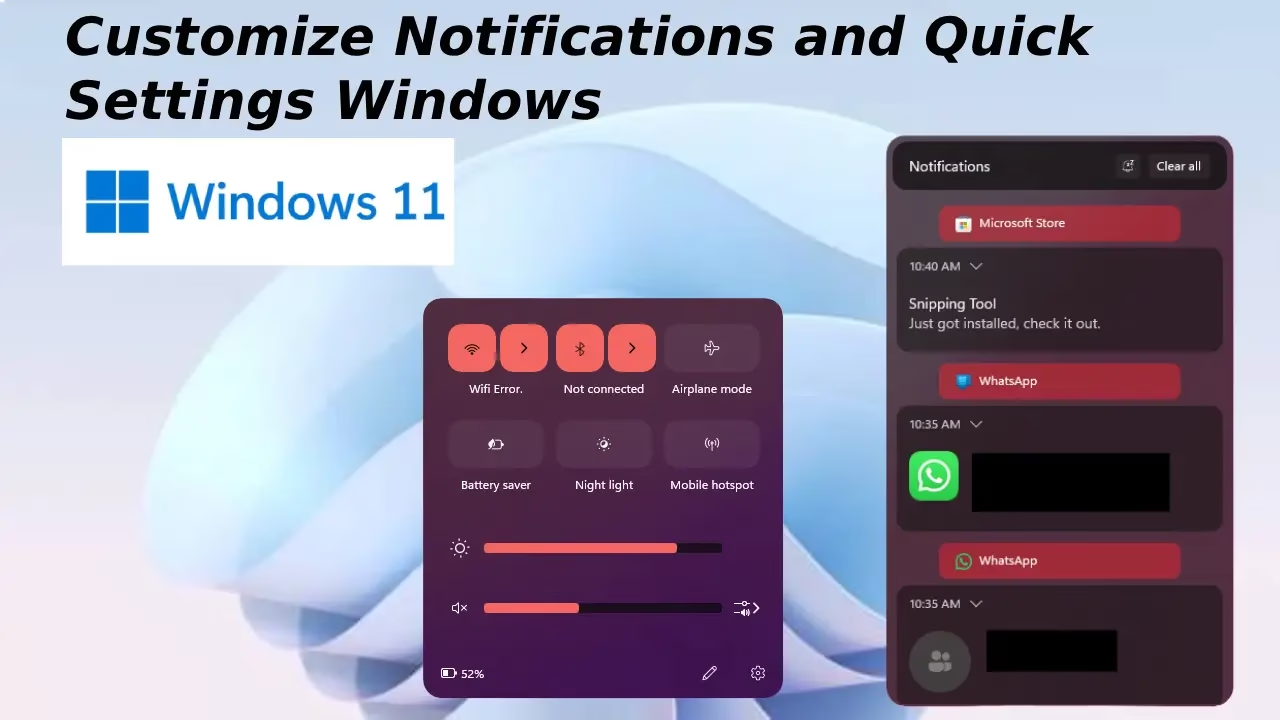
Ways to Customize Notifications in Windows 11
Notifications in Windows 11 keep you informed, but unchecked they become distractions. Fine-tuning them lets you prioritize what matters while silencing the rest. Here are several effective methods, including some lesser-known options.
1. Prioritize Critical Alerts with Do Not Disturb and Priority Settings
Do Not Disturb (formerly Focus Assist) is a powerful starting point. It quiets non-essential alerts without missing urgent ones.
- Open Settings (press Windows + I) and navigate to System > Notifications.
- Toggle on Do not disturb. Set automatic rules for specific times, like during meetings or sleep hours.
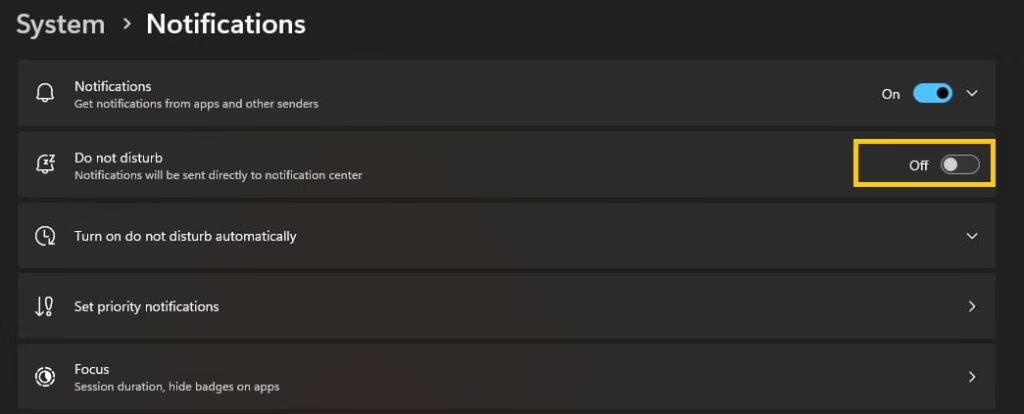
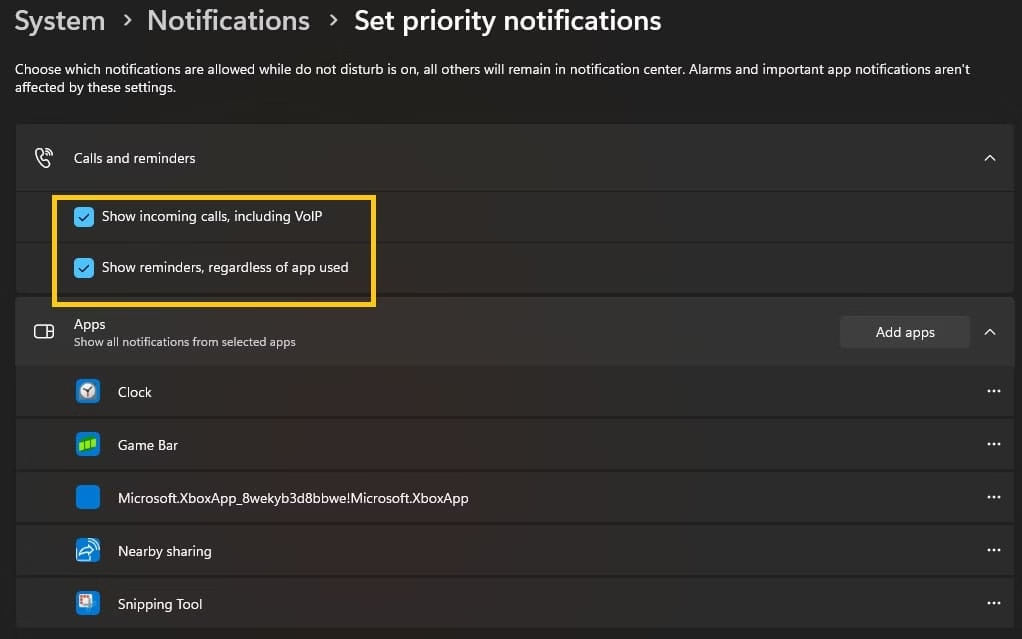
- Under Priority notifications, choose which apps or contacts break through the silence. You can mark calls, reminders, or specific apps as top priority.
- For extra control, set notifications to show only on the lock screen for select apps while hiding sensitive content elsewhere.
This setup proves especially helpful for professionals who need calm during deep work sessions.
2. Fine-Tune Per-App Notification Behavior
Windows 11 offers granular control for individual apps, going far beyond a simple on/off switch.
- In Notifications settings, scroll to Notifications from apps and other senders.
- Click any app to adjust:
- Show notification banners (pop-ups).
- Display in the notification center.
- Play sounds.
- Set priority levels (Top, High, or Normal).
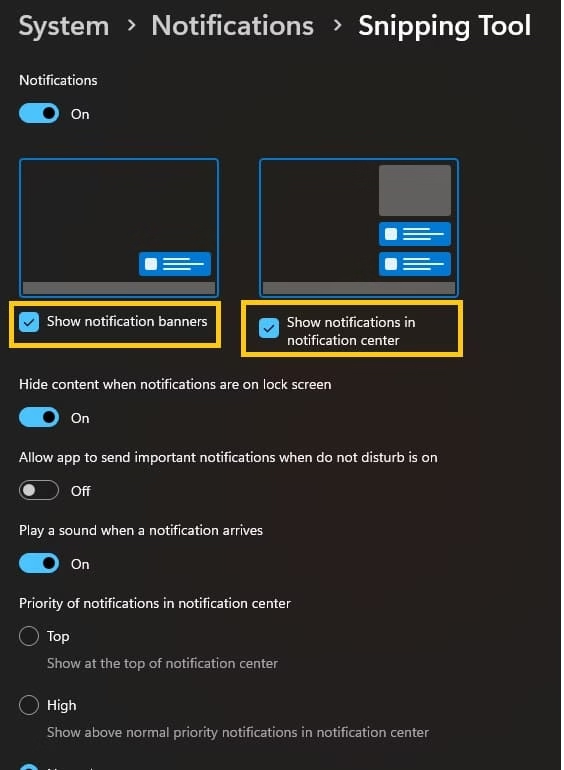
- Experiment with hiding banners for chat apps during work but keeping them in the center for later review.
Unique twist: Combine this with scheduled rules. For example, allow email notifications only during business hours while muting social apps entirely after 8 PM.
3. Change Notification Sounds and Create Custom Audio Cues
Tired of the default chime? Personalizing sounds adds personality and helps distinguish alerts by ear.
- Go to Settings > System > Sound > More sound settings (or search for “Change system sounds”).

- In the Sounds window, find Windows Notification under Program events.
- Select a new built-in sound or browse for a custom WAV file. Apply and test it.
- For per-app sounds, use advanced tools or registry tweaks carefully (back up first). Some users create different schemes for work versus personal use.
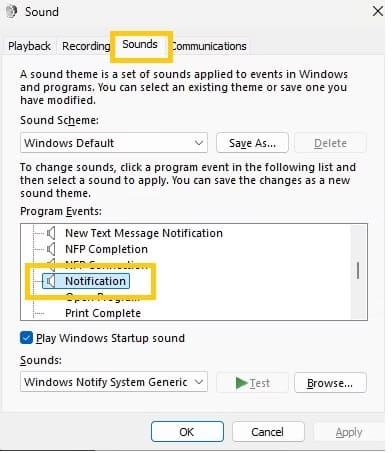
Pro tip: Download free WAV files online and assign unique tones to critical apps like your calendar or messaging tools. This turns auditory clutter into helpful signals.
4. Reposition Notifications and Customize Their Appearance
Notifications typically pop up in the bottom right, but you can shift them for better visibility, especially on multi-monitor setups.
- For native options, taskbar position influences panel location somewhat.
- Advanced users turn to lightweight tools like Windhawk (a safe customization utility). Its “Notifications Placement” mod lets you move pop-ups to different corners or even other monitors.
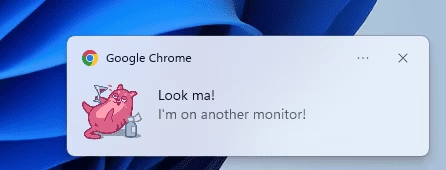
- Pair it with the Windows 11 Notification Center Styler mod to adjust transparency, themes, or overall look without heavy third-party apps.
These tweaks make notifications less obstructive during fullscreen tasks like gaming or video editing.
5. Schedule Custom Notifications Using Built-in Tools
Why only rely on app-generated alerts? Create your own timed reminders.
- Use Task Scheduler (search for it in Start): Create a new task, set a trigger (time or event), and add an action to display a message or run a script that triggers a toast notification.
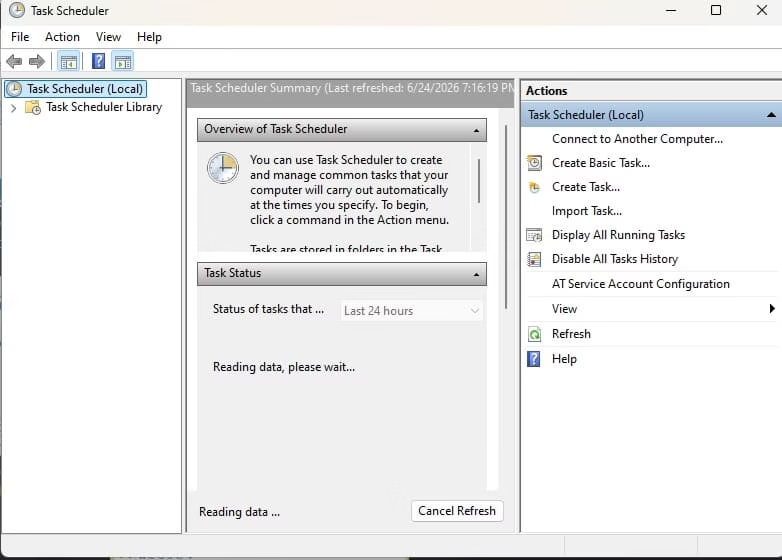
- Microsoft To Do app integrates nicely for recurring reminders that appear as notifications.
- For developers or power users, explore simple PowerShell scripts to generate custom toasts with rich content like images or buttons.
This approach shines for habit-building or project milestones.
6. Leverage Focus Sessions and Integration with Productivity Tools
Windows 11 ties notifications into broader focus features.
- Enable Focus sessions in the Clock app. It mutes distractions and pairs with timers.
- Integrate with apps like Outlook or Teams to route important updates differently.
- Third-party managers (such as Toastify) add themes, custom filtering, and advanced timing controls for toast notifications.
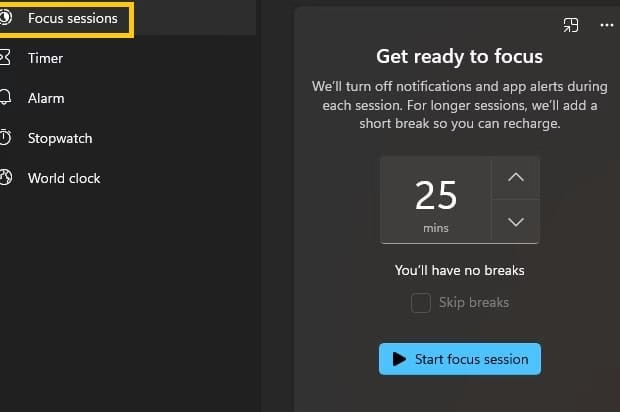
Always review app permissions regularly to prevent rogue senders from sneaking through.
7. Advanced Tweaks: Registry and Group Policy for Power Users
For deeper customization without extra software:
- Use Registry Editor (carefully) to disable specific notification types or the entire center if needed.
- Group Policy (Pro editions) offers enterprise-level controls for notification behavior across devices.
These methods suit IT pros or those managing multiple PCs, but back up your system first.
By mixing these techniques, your notification experience becomes tailored rather than overwhelming. You’ll spend less time dismissing alerts and more time on what counts.
Also know: Get Help with File Explorer in Windows 11
Ways to Customize Quick Settings in Windows 11
The Quick Settings panel (accessed via Windows + A or taskbar icons) puts essential toggles at your fingertips. Customizing it streamlines daily tasks like toggling Wi-Fi or adjusting brightness.
1. Rearrange and Prioritize Tiles for Faster Access
Recent Windows 11 versions emphasize drag-and-drop organization over heavy editing.
- Click the network, volume, or battery icon in the taskbar corner to open Quick Settings.
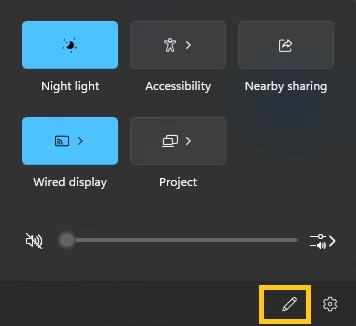
- Look for the pencil/edit icon (if available in your build) or simply drag tiles around.
- Prioritize frequently used ones like Bluetooth, Airplane mode, or Night light at the top.
- In newer updates (like 24H2+), the panel is scrollable, so drag less-used items lower.
This simple change reduces clicks and makes the panel feel personal.
2. Add or Remove Relevant Quick Actions
While some builds limit full add/remove, you can still curate effectively.
- Enter edit mode and pin/unpin available toggles such as Cast, Project, or Focus assist.
- For missing options, check for system updates or use PowerShell scripts to expose more actions.
- Right-click (or long-press) tiles in supported builds to unpin directly.
Focus on tiles matching your workflow: creators might want dark mode or performance modes upfront.
3. Integrate System and Third-Party Enhancements
Go beyond defaults with smart integrations.
- Link Quick Settings with PowerToys utilities for extended controls (e.g., keyboard shortcuts triggering panel elements).
- In insider or future builds, new toggles like enhanced dark mode appear automatically.
- Use tools like Windhawk for deeper panel styling or positioning tweaks.
These elevate the panel from basic to a true command center.
4. Adjust Panel Behavior and Accessibility
Make Quick Settings more accessible and less cluttered.
- Toggle related features in Settings > System > Notifications that influence panel interactions.
- Customize brightness, volume sliders, or media controls for quicker media management.
- For multi-monitor users, explore mods that align panel behavior across displays.
Experiment during low-stakes moments to find your ideal layout.
5. Create Workflow-Specific Profiles Indirectly
While no native profiles exist, combine Quick Settings with other customizations:
- Use different desktop setups in Task View and pin relevant tiles mentally.
- Script quick access via PowerToys or third-party launchers that complement the panel.
- Regularly review and prune for seasonal changes (e.g., travel-focused toggles).
This keeps things fresh and efficient over time.
Quick Settings customization turns a generic menu into your personalized hub. Small adjustments here save seconds that add up throughout the day.
Also know: Best Methods to Sync Clipboard Across Devices Easily on Windows 11/10
Conclusion
Customizing notifications and quick settings in Windows 11 transforms a standard OS into one that truly works for you. Start with built-in options, then layer in advanced techniques like positioning mods or custom sounds as you grow comfortable. Your productivity, focus, and enjoyment will thank you.
Remember, the best setup evolves with your needs, so revisit these settings periodically. What unique tweak will you try first? Share your favorites in the comments. For more Windows 11 tips, explore other guides on Avsoftlab.

Recent Posts

Unique Ways to Customize Notifications and Quick Settings Windows 11
Editorial Team, 25 Jun 2026

Get Help with File Explorer in Windows 11
Editorial Team, 23 Jun 2026

All Transformer Movies in Order Till 2026
Editorial Team, 22 Jun 2026
Most Used Tags
Blog Category
Get amazing web and
app development deals
for your business from us.